Showing posts with label In the Kitchen with MM. Show all posts

Wednesday, August 25, 2010

Cantaloupe Sorbet


We're going to start this post with joke for all you gardeners (mom this is for you!) and fruit lovers out there.. 

Why do melons have fancy weddings?.....  Because they cantaloupe! 

Wheew.. I don't know why I spend so much time baking when I should obviously be a comedian! ;)

But on a more serious note.. this Cantaloupe Sorbet is the real deal. 

When we were kids back to school time meant the end of summer- the end of fun in the sun. When you're in the real world however, there is no summer.. no days off to spend lounging at the pool, no long vacations, and there is certainly no break in responsibilities... No siree... when we find ourselves in the working world summer time just means hot weather and crowds and back to school time means great sales at the mall and tax-free time in Texas.

But one thing about the summer that never changes no matter how old you are? The abundance of ice cream, sorbets and sherbets. Mountain Man loves him some of these chilled desserts and although we don't use it as often as we should, the ice cream maker has definitely come in handy a time or to this past summer.

The other day we realized the cantaloupe we had just recently purchased was way past its prime. A little too smooshy (that's scientific term) for my liking, I suggested MM give it a go in the ice cream maker- sorbet style. What resulted was a fabulously refreshing dessert.. perfect for the remaining warm summer nights...and in Texas summer doesn't end until about October, so we're still good.


Cantaloupe Sorbet

1 cantaloupe, skin removed and cut into chunks
2/3 cup sugar
1/2 cup corn syrup
6 TBS fresh lemon juice (about 2 lemons)

Add all ingredients to a food processor and puree.
Place pureed fruit in fridge over night.
Pour into ice cream maker and get that bowl spinning!

I'll leave you with just one more...

Cantaloupe? Then cohabitate :) 

Thank you, thank you.. I'll be here all week!


Friday, August 13, 2010

Marble Rye Bread and The Lunch Box Project

Before I get started I wanted/need to share something I think is super cool...A few days ago I became Foodbuzz friends with Lisa Orgler.. Lisa is the designer and illustrator of The Lunch Box Project, an awesome site that started as a means to document her goal to paint an image of food every day for one year (she calls it snacking on food art- love it). She began painting her images on playing cards and coasters and after reaching her goal of a year she decided to continue her journey with different monthly themes. This month, she scoured the foodie blog world for inspiration from peer blogs and one of my posts was lucky enough to get chosen!

How cute!?

All of her paintings are up for grabs on her etsy site too! For a very reasonable price you can browse through her food art and find a print perfect for that little spot right above the kitchen sink. I'm not only going to purchase the art inspired by my food, but I have my eye on a few other paintings as well that are going to make their way into my kitchen! 

So what are you waiting for?? go check out Lisa at The Lunch Box Project! but first.. check out this Marble Rye Bread :)


For a few months now Mountain Man has been on a mission to make the perfect Marble Rye Bread (the first one he made was as hard as a rock). When one of our friends here, who is originally from Connecticut, told us that she can't find the bread anywhere in Central Texas, MM made it his personal mission to recreate her favorite bread.

Mountain Man's bread is usually pretty tasty, but this one (at least in my book) is the best one he's done yet.    I hope that when MM finds a full time job I won't have to stop coming home to fresh baked goodness.

For this edition of 'In the Kitchen with Mountain Man'...

Marble Rye Bread
Yields 2 loaves

Light Rye:
1 1/2 cup warm water (110 degrees)
1 TBS honey
2 TBS molasses
2 tsp yeast
3 TBS shortening
1 tsp salt
1 cup Rye flour
1/4 cup flax seed meal
1/4 cup oat flour
3 cups bread flour

Grease a large bowl with butter or crisco and set aside.
Mix water, yeast and sugars together and let stand for 8 minutes. 
Drop in shortening, salt, rye, oat, flax seed meal and stir with a wooden spoon.
Begin adding bread flour one cup at a time until dough begins to form into a ball.
Turn out on a floured surface and knead in remaining flour.

Knead for 7 minutes and 30 seconds. Put into greased bowl and let rest of 1 hour.

Dark Rye:
1 1/2 cup warm water
3 TBS honey
2 tsp yeast
3 TBS shortening
1 tsp salt
3 TBS cocoa powder
3 TBS water
1 cup Rye flour
1/4 cup flax seed meal
1/4 cup oat flour
3 cups bread flour

Grease a large bowl with butter or crisco and set aside.
Mix water, yeast and sugars together and let stand for 8 minutes.
Drop in shortening, salt, rye, oat, flax seed meal and stir with a wooden spoon.
In a small bowl, mix cocoa powder and water- add to dough mixture and mix until combined.

Begin adding bread flour one cup at a time until dough begins to form into a ball.
Turn out on a floured surface and knead in remaining flour.
Knead for 7 minutes and 30 seconds. Put into greased bowl and let rest of 1 hour.

On a floured surface cut each dough into quarters. Two of each color will be used in each loaf. Roll each quarter out to roughly 9x7  (bigger if you want tighter swirls, smaller if you want thicker swirls but always 9 inches (just roughly over the length of the bread pan).

Begin with the light rye on the bottom and alternated with dark, then light then dark. Roll all layers up together making sure the light rye covers the entire loaf. Pinch the joint together and turn the ends under and drop into greased loaf pan. Cover and let rise until it fills the loaf pan. Repeat with other 4 quarters for second loaf.

Brush with egg wash (1 egg, 1 TBS water) and sprinkle with caraway seeds just before baking in a 375 degree oven for 40 minutes. Allow to cool briefly before enjoying!

Happy Baking!


Sunday, July 4, 2010

Blueberry Pie ...for the 4th of July


Something red, Something white and now something blue...It's the 4th of July! 

The other day MM came home from work with 3 boxes of blueberries.

My first question: 'Blueberry on sale or something?'
'Nah...Blueberry Pie,' he responded as he rushed to the fridge.

A man who makes pies for fun? I can totally respect that. In fact, I LOVE that.

And so I give you on this wonderful fourth of July weekend...Blueberry Pie a la Mountain Man.

Blueberry Pie
Prep time: a few hours   
Oven: 425/350 Bake time: 40 minutes total

Crust:
3 cups AP flour
2 tsp sugar
3/4 tsp salt
1/2 cup butter, cold and cubed 
1/2 cup shortening, cut into chunks
2 tsp lemon juice
6 TBS ICE COLD water 

Place flour, sugar and salt in food processor and pulse a few times.

Add butter and shortening, a few chunks at a time, pulsing as you go. 
Sprinkle in lemon juice and continue to pulse, inhibiting the development of gluten.
Pulse until you reach a chunky mixture- Don't over mix!
Add half water and begin processing, adding in the rest as you go. Once incorporated, stop.
Dump dough out onto a lightly floured surface, giving the dough a quick knead forming into a solid ball.

Cut the ball in half and shape each half into a disc. Wrap in plastic wrap and refrigerate for about an hour.
After refrigeration, bring one of the dough discs to your lightly floured surface and roll out into a circle**. 
**There are many theories on rolling, but I find that rolling from the inside out and only going in a singular direction versus back and forth works best.
To make the move to the pie pan easier, fold the dough in half and then again (quartered). Once transfered to the pan unfold, smooth out and cut off excess hanging over the edges. 
Return to the fridge.

Blueberry Filling:
4-5 cups of blueberries
1/2 cup sugar
4 TBS corn starch
2 tsp lemon juice

In a small bowl combine sugar and corn starch, mixing well.
In a larger bowl, place rinsed blueberries and add lemon juice. Sprinkle sugar mixture, but make sure to reserve a bit for the end.
Using your hands, as spoons can damage your berries, mix well and pour into pie shell. Finish off with a sprinkling of remaining sugar.

Finished crust
Roll out remaining disc of dough just as you did the first.
This is where you have options for your finishing touches: A simple solid top is very easy and can be very elegant. I have also seen shapes cut out with a cookie cutter and places in layers on top which can be very festive. I however, love the challenge and intricacy of a lattice crust.

With the dough rolled out, cut 3/4 inch wide strips that are the length of your pie pan. I start from the middle and in one direction follow a simple over-under pattern by folding back one side of the dough strip when laying the next layer down. Continue until the entire top is covered and then crimp the edges.


Refrigerate for another 30 minutes while the oven preheats to 425. Just before baking, brush with a wash of 1 egg yolk and 1 tsp of cream and finished off with a sprinkle of sugar.

Bake at 425 for 20 minutes then tent with foil and bake at 350 for 20 minutes more.

The hardest part? Letting it stand and cool for 2 hours before you can dig in!

Happy Baking and Happy 4th of July!!


Wednesday, June 30, 2010

Healthier Whole Wheat Bread & Honey Apple Butter


I don't think I ask much of Mountain Man.. well, ok.. I don't think ask too much of Mountain Man. But one thing I will ask of him is bread- sandwich bread to be specific.

Bread making scares me. I feel like there is so much involved: the yeast, the rising, the waiting, the kneading, the waiting...I get overwhelmed just thinking about it! I'll make up a mean quick bread any day, but throwing yeast in the mix totally intimidates me. I guess I should try it out some time though...

In the mean time, I think MM does a pretty good job in the bread department and I'm going to let him keep doing a good job. :)

For this edition of "In the Kitchen with Mountain Man" the recipes are completely his, but the narration is completely mine- with a lot of help.

Healthier Whole Wheat Bread
1st rise: 1 hour
2nd rise: 40 minutes
Oven: 425-350
Bake Time: 30 minutes
Makes 1 large loaf

2 cups warm water
3 TBS active dry yeast
1/4 cup honey
1/4 cup sugar

1 cup bread flour
1 cup oat flour
1/4 cup quick oats (coarsely ground)
1/4 cup flax seeds
3 cups whole wheat flour
1/4 cup sesame seeds
1/8 cup flax seeds

In a large bowl, whisk together water, yeast, honey and sugar. Let proof/stand about 5 minutes. (For those of you as unfamiliar with bread terms as I am, "proofing" basically means letting the yeast become active and the mixture begins to foam)
Mix bread, oat, and 1 cup of whole wheat flour, flax seeds and oats.
Add flour mixture to wet mixture, adding the rest of whole wheat flour, one cup at a time, as you go until dough needs to be turned out onto a lightly floured surface.
Knead dough for about 8-10 minutes, dough should be elastic-y.
Put the dough back in the bowl and cover with saran wrap (spray with Pam first).
Let the dough rest for about 1 hour or until it has doubled in size.
Prepare lightly floured surface with a sprinkling of sesame and flax seeds.
After the dough has napped an hour, turn dough back out on lightly floured surface and lightly deflate. Roll the dough in the seeds until covered.
Transfer seed covered dough into loaf pan and cover again with saran wrap, this time letting it rest for about 40 minutes.

While resting, preheat oven to 425.
After the dough is well rested, remove saran wrap and immediately turn oven temperature down to 350.
Bake for 30 minutes.
Transfer loaf to cooling rack until ready to eat.


Honey Apple Butter
1 whole apple
2 cups water
1/2 cup apple cider vinegar
cinnamon
nutmeg
cloves
1 cup butter, 2 sticks
1/4 cup honey

Quarter apple- removing seeds and stem (but not the core-it will dissolve).
Bring water and vinegar to a boil. Add apple pieces and sprinkle about 1/4 tsp of cinnamon, dash of nutmeg and dash of cloves into pot.
Boil for 20-30 minutes or until apples are extremely soft.
Remove apples and puree in food processor.
In a medium sized bowl, melt butter, 1 tsp salt and 1/4 cup honey in microwave.
Mix in pureed apples.
Add 1/2 tsp cinnamon, 1/4 tsp cloves, 1/4 tsp nutmeg (or less depending on taste preferences).
Refrigerate until mixture becomes solid again.

Slather on some Healthier Whole Wheat Bread and you're ready to start your day!

Happy Baking!

Sunday, June 6, 2010

Homemade Bagels

So I gave him a few weeks, but now that Mountain Man has gotten settled in he's going to be spending more time in the kitchen... and this is most definitely not a bad thing because he is a phenomenal cook and an awesome baker- especially when it comes to breads. Instead of writing about what I think he was doing in the kitchen this morning I decided to give him the honors and write up his own post :) Let me know how you think he did!


In the Kitchen with Mountain Man: Cinnamon-Raisin and Everything Bagels

Evan decided that she wanted a VERY tasty breakfast so she turned the reigns over to me because bagels were next up on the tick list.  She had been eyeing a bagel recipe found in Healthy Breads in 5 Minutes a Day which had highlighted the Cinnamon-Raisin variety so I decided to tackle the project which started the night before.

The thing about Artisan Breads is that you can take a "master dough" recipe and make a large quantity which you can keep in the refrigerator, and from that master dough many different breads can be made.  So the night before I threw together the master dough which only took about 10 minutes.  


Master Recipe
Recipe found in Mother Earth News Magazine (Dec2009/Jan2010) featuring: Healthy Breads in 5 Minutes a Day by Zoe Francois and Jeff Hertzberg

5 1/2 Cups of Whole Wheat flour
2 Cups  AP flour
1 1/2 tbsp Granulated yeast
1 tbsp salt
1/4 cup of vital wheat gluten
4 cups water (100 degrees F)

All the dry ingredients go in together, get a little mix up, then add the water one cup at a time.  Once it is all evenly moist its time to rest....Set the dough aside and let it rest for 2 hours or until it begins to collapse. 
*I left it in the fridge overnight, which made the dough easier to work with in the morning.  The only thing I miss about this recipe is that there is no kneading involved, which is one of my favorite things about baking breads and other yeast based baked goods.

The entire bagel process was suprisingly really easy.  Since the dough was prepared the night before I simply pulled off about a grapefruit sized piece and rolled it out to about 1/4 inch thickness.  All of the sudden I had a flashback to last weekend when I was making cinnamon rolls as I sprinkled some cinnamon, sugar, and raisins onto the dough.  Main difference is that it was a lot less than what goes into cinnamon rolls.  So I sprinkled on the cinnamon, sugar, and raisins and the rolled it back up like a log.  Using my favorite kitchen tool, a dough knife, I cut the log into six equal pieces approximately 3oz each and reshaped it into a ball.  After all of these were cut and shaped they were set aside to rest again for 20 minutes.  While the dough was resting the boiling pot was prepped with: 

8 qts water
1/4 cup of sugar
1 tsp baking soda

After letting the dough rest it is time to shape the bagels and begin the boiling process.  Once the water has reached a boil, take each ball and poke a  hole into it and stretch it out.  As you stretch it, you have to keep working around the dough similar to stretching pizza dough so that one part is not thinner than another.  When you achieve the shape you want, drop them into the boiling water for two minutes then flip with a slotted spoon for another two minutes.  To avoid sticking to each other, I found it easy to stagger them into two separate boiling pots so that they would begin cooking before the next was put in next to it.  After boiling, I placed them onto a clean dish towel to pat them dry.

While the bagels were boiling, the oven was getting nice and hot with a baking stone already in there as well as a cast iron skillet in the bottom.  With a little corn meal sprinkled on the stone, on the bagels go for the last step of the process.  Right before closing the oven, pour a cup+ of hot water into the cast iron skillet to create some steam and shut the door.  20 Minutes later and a little cooling time, breakfast is ready!


All in all I think he did pretty good :) The bagels were delicious.. we have a few things we're going to try for round 2 -getting close to the perfect bagel, but for a Sunday morning after a great weekend they were pretty darn good.


Breakfast was served- Happy Baking!!

Monday, April 5, 2010

In the Kitchen with Mountain Man (and Adventures in Cake Decorating)

Food is something that is very important to MM and I... we are both very passionate about all that is food and love spending time in the kitchen together cooking, eating and even baking. It's great to be able to share those kind of things with someone and it makes meals a lot more fun when it becomes a team effort. 

The more I got to know MM as we first began our relationship the more the kid intrigued me.. already totally not "my type" it was never a dull moment as we were getting to know each other.  It was one lazy Saturday in particular when I realized once and for all that this was the guy for me... we hadn't been dating too long and like I said I was always learning something new about him. As we laid around this particular afternoon, MM started getting ancy (surprise surprise) and insisted we do something, 'Let's make something,' he said, 'Make something? like what?' I retorted (It was Saturday afternoon, all I wanted to do was hang) 'Yeah,' he said, 'Let's make some pies.' [Insert record scratching and music stopping here] Of course, I was intrigued.. a guy who wants to make pies on a Saturday afternoon? Let me rephrase that.. a good looking, normal, cool guy who wants to make pies on a Saturday afternoon? Shortly there after we made our way to the grocery store to get ingredients and baked pies for the afternoon... cherry and apple to be exact. Did I mention he latticed the top and made the crust from scratch? sans recipe? out. of. control. 

In addition to the wonderful pies, MM bakes a mean bread. While he was telling me about some loaves he was making the other evening it dawned on me- what a perfect opportunity to get him involved, do some explaining and be included in this lovely blog! When I ran the idea by him he was totally on board- guest appearances by my MM complete with personal narrations (with a few witty comments by yours truly) I mean, he is an integral part to the bakery we want to own one day... so making his first, but most certainly NOT his last appearance... ladies and gentleman... all the way from Georgia...

Welcome to this addition of 'In the Kitchen with Mountain Man.' 

Sourdough Baguettes and a Loaf

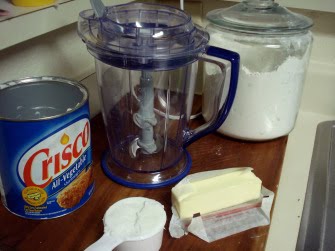
Sourdough is a LOOONG process, but well worth the wait! This project was started on Tuesday when I put together the "starter mixture" and let it begin to sour. Friday afternoon rolled around and I knew by the pleasant beer smell that the starter was ready to be placed into action (this starter takes 3 days to get ready so plan accordingly- recipe is below) . I got this simple recipe from cookingbread.com but unlike my girlfriend, I like to have a little freedom with recipes so I tend to deviate. (he was trying to be funny here and he knows this is crap, since I often change things up and even create my own recipes... we're going to have to work on his blog wit) The recipe began with some of the starter, then I added a little more warm water, a little salt, some whole wheat flour and a lot more bread flour. For those of you that really like specifics here are the exact amounts:

Starter
2 cups flour
2 cups warm water
1 tsp yeast

Mix all ingredients and let sit for 3 days. If you don't want to use it right away, place in an airtight container and put in the fridge.

Sourdough Bread
1/4c starter
2 1/2 c warm water
2 tsp salt
1 cup whole wheat flour
5 1/2 c bread flour
After mixing in the top four ingredients, add the rest of the flour one cup at a time until it was too thick to stir and turn it out on the counter.  This is my favorite part!  Kneading the rest of the flour into the dough takes some time and effort, but I absolutely love this part of the process. 
The way it feels under your hands, the way you can be rough with it, and the fact that the more you knead the better it will be (most of the time) is awesome.  After kneading the bread for about 10 minutes, most of the flour should be incorporated into the dough.  At this point the dough should be elastic and springy, rebounding if you poked it with your finger. Then, let it rest for half an hour.  
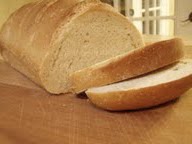
Bread in general is such a waiting game and timing is crucial.  All of the pauses and rests are so important in the baking process so if you get impatient, you could end up with some disasters (or really flat bread).  After the rest, I went ahead and formed it into 2 smaller baguettes and half filled a loaf pan.  Then again I waited... this time 12 hours!  When I woke up the next morning they had grown and doubled in bulk, so I popped them into the oven.  
375 degrees for 45 minutes was all it took... along with a little steam to give them that awesome golden brown crust and beautiful slash that is characteristic of baguettes.   


 /\^/\


And there you have it folks.. Mountain Man's first blog spot.

I mentioned my Easter cake in the title and I apologize for the length of this post,
 but I didn't want to have to post more than once this evening so I figured I'd just consolidate it all into one. In the future, MM's posts will probably be their own post.


Adventures in Cake Decorating
This past Friday concluded Lesson 3 in my cake decorating class. Lesson 3 was devoted to learning the art of royal icing flowers, so we didn't have to come with a completed cake till the last week of class which just happened to be Easter. I knew I would be joining my friends down in Austin for Easter Sunday Dinner and it was my task to bring the dessert (obviously). In this last class we were supposed to use all the flowers we had been making for the past few weeks in addition to learning to 'basket weave.' 
I went with a Neapolitan Cake - layers of vanilla cake and chocolate cake with a strawberry buttercream filling and of course covered and decorated with vanilla buttercream.
The flowers were all made from royal icing, making them very edible (Steph and I ate at least half of them after dinner) and the basket weaving was actually not as difficult as it might appear. The Easter Bunny's butt was inspired by the geniuses behind 'Hello Cupcakes' although mine is a little different in regards to where he is and how he was decorated- but I still must give credit where it's due.

Neapolitan Cake
Adapted from Epicurious 
Oven: 350 Bake time: 30minutes


Vanilla Cake
1 cup oil
2 1/2 cups AP flour
1/2 tsp salt
1 TBS baking powder
3/4 cup milk
4 TBS sour cream (If you don't want to buy sour cream, you can just use 1 cup of milk)
1 tsp vanilla extract
2 cups sugar
4 eggs

Chocolate Cake
1/4 cup cocoa 
2 TBS milk

Whisk flour, baking powder and salt.
In another bowl mix milk, sour cream and vanilla extract.
Beat oil, sugar, and add eggs one at a time. Reduce speed and alternate adding flour mixture and wet mixture, beginning and ending with flour mixture. 
Once all is combined, pour half of batter (about 2 and a half cups) into separate bowl and add 1/4 cup cocoa and milk.
Pour batter into prepared pans.
Bake for 30 minutes or until toothpick comes out clean and transfer to cooling rack.
After cooled, slice each cake in half. 
Fill cake with strawberry buttercream, alternating layers: chocolate and vanilla.

Strawberry Buttercream
1 cup crisco
6 frozen strawberries (defrosted, drained-save 2 TBS of juice- and mashed)
4 cups powdered sugar

Beat crisco and saved strawberry juice until combined. Beat in powdered sugar until smooth. Fold in strawberries until incorporated.

Happy Baking!!