Showing posts with label pie. Show all posts

Wednesday, December 21, 2011

Chocolate Bourbon Pecan Pie & Christmas Cookies


Has this Christmas snuck up on anyone else?

Seems like just yesterday I was walking down the aisle and now, all of a sudden, it's Christmas time!

Can I let you in on a little secret? I just finished my Christmas shopping this week...like as in Monday afternoon..thank goodness for the internet.

And you can imagine if it took me that long to get my stuff together to buy gifts, that my cookie/holiday baking also took a hit.

In addition to the busy-ness that was my whole month of Decemeber, my cake business has been booming recently (yay!) and with two cakes to bake and decorate every weekend I really haven't had the chance to spend any other time in the kitchen.

By this time last year I was smooth sailing till Christmas- I had all my cookies baked...


and Jeweled Lace Cookies (only 35 calories a cookie!)
Not this year though... I just started baking cookies this past weekend! Would you all still want to see what I've made even after the holiday is over??

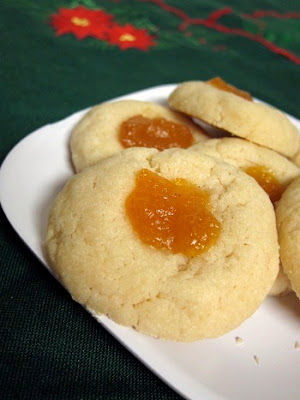
So while I'm not sharing any new cookies with you this year (yet)...If you're anything like me, and you've been slacking this year for one reason or another, I have the perfect dessert to make it up to you. This is sure to be a crowd pleaser at any Christmas dinner- a little twist on a holiday classic, this pecan pie infused with bourbon and chocolate chips will put a smile on anyone's face.
Chocolate Bourbon Pecan Pie
Adapted from myrecipes.com
Bake: 425/350 Total time: 1 hour

3 eggs, beaten
3/4 cup light corn syrup
4 TBS butter, melted
3/4 cup brown sugar
3 TBS bourbon
2 TBS AP flour
1 tsp vanilla
1 1/2 cup chopped pecans
1/2 cup semi-sweet chocolate chips
1 package prepared pie crust

Preheat oven to 425. Press pie crust into 9-inch pie dish as directed on package and press/crimp edges.
In a large bowl, mix eggs, corn syrup, butter, brown sugar, bourbon, flour and vanilla until well combined.
Fold in pecans and chocolate chips.


Pour mixture into prepared pie shell.

Bake for 15 minutes at 425, then reduce temperature to 350 and continue to bake for 45 minutes.
Transfer to cooling rack and allow to completely cool before serving.

Happy Holidays
and
Happy Baking!

Monday, July 25, 2011

Cherry & Blueberry Mini Pies

Pies just scream summer don't they?

When we had some friends over for dinner the other night I knew a pie was in order.. but not just any pie..

Mini pies!

I love individual desserts.

Not only does everyone get their own pie to munch on, you don't have to worry about a lot of left overs that you may or may not eat for breakfast or nibble on for the rest of the week despite the fact that you still need to be able to fit in your perfectly fitting wedding dress in 3 months... hypothetically speaking of course.

Even though Mountain Man attempts to sway me, cherry pie just happens to be my favorite.

But it just didn't feel right to do something so simple, so I threw in a few blueberries and finished 'em off with a little sugary and oh-so-delicious crumb topping.


Cherry & Blueberry Mini Pies
Makes 4 mini pies
Oven: 350 Bake time: 25 minutes

1 package pie crust (or use your favorite recipe)
1 can cherry pie filling
2 cups fresh blueberries

Crumb Topping
1/3 cup brown sugar
2 TBS butter, melted
1 TBS AP flour
dash of cinnamon

Preheat oven to 350. Spray large muffin pan with cooking spray and set aside.
Make crumb topping by mixing all ingredients in a small bowl until combined and set aside.
On a lightly floured surface, roll out pie crust.
Cut 4 circles using an extra large round cookie cutter (Mine was slightly larger than the muffin cup).
Place cut outs in prepared muffin pan and press into bottoms, lightly pinching the sides.
Add about 1/4 cup of blueberries to bottom of each crust.


Add enough cherry filling to almost reach the top of the muffin cup (about 1/3 cup each).


Add another 1/4 cup of blueberries on top of cherry filling.


Sprinkle crumb topping evenly on each of the mini pies.
Transfer to oven to about 25-30 minutes or until the sides of your crust are lightly browned.
Allow to cool in the pan on a cooling rack for about 30 minutes before trying to remove.
Serve with fresh whipped cream or ice cream.

I wish I had a picture once they were all dolled up, but they were too good and the guests were waiting!

Until next time..

Happy Baking!

Thursday, March 24, 2011

Chocolate Peanut Butter Pie


Warning: This pie is for chocolate and peanut butter lovers only. I repeat, if you do not like the oh-so-chocolately-peanut buttery flavor this pie is not for you. 

Still here?

Good.


Even for peanut butter lovers, this is a very rich, very decadent pie, absolutely not for the faint of heart. But if you love peanut butter as much as I do, then you'll absolutely enjoy a slice, even if it is a small one.

We start with a chocolate cookie and peanut crust...


topped with a layer of peanut butter filling...


 and finished off with chocolate whipped cream.


Wonderful, right?

All I have for you here is pictures though... If you want the recipe you're going to have to head on over to Little Bitty Bakes where this pie is featured in Liz's Chocolate Chip Thursday. I do hope you'll drop by.. Liz has a great little site full of some delicious treats and I was so excited to participate in her monthly guest post spot!


What are you waiting for?? Go eat pie!
Happy Baking!

Tuesday, October 19, 2010

Pumpkin Pie Cheesecake with Biscoff Cookie Crust

A few weeks ago I was contacted by the lovely people at Lotus Bakeries (they’re the ones responsible for the delicious little cookie we have all grown to love whenever flying Delta Airlines)

I absolutely love Biscoff cookies- whenever I fly Delta I always ask the flight attendant for extra to take home with me.. so you can imagine my excitement when I received an email followed by this package...


 Lotus Bakeries was way too generous- not only did I get a whole box of Biscoff cookies to enjoy, but now I have some little individual packages to hand out to some lucky trick or treaters! Did I mention they're low in calories and sugar? Especially compared to candy! Your welcome, parents :)

My love for these caramelized treats didn't stop there though..how about this cheesecake?


While browsing the internet the other night I came across this Pumpkin Pie Cheesecake and mid cookie crunch, it hit me! How yum would Biscoff cookies be as a crust!? If you’re not lucky enough to get a free box of cookies like me, you can always go to your local Walgreens and pick some up or order a box online directly from Biscoff.

Now, if you’re a regular follower of this blog you’ll notice that I’ve never attempted a cheesecake before. To be honest, I can normally give or take this particular dessert, but this Pumpkin Pie Cheesecake may have changed my mind.

Pumpkin Pie Cheesecake with Biscoff Cookie Crust
adapted from Right @ Home

Biscoff Cookie Crust
2 cups crushed Biscoff Cookies (about 1 ½ sleeves put through a food processer)
6 TBS butter, melted
¼ cup sugar

Preheat oven to 350. Lightly grease a 9-inch springform pan and set aside.
In a small bowl, mix crushed cookies, melted butter and sugar until blended.
Press cookie mixture into pan, pressing cookies up along sides about ½ to 1 inch.
Bake crust for 8 minutes and remove from oven.

Pumpkin Pie Cheesecake Filling
1 ¾ cup Pumpkin Pie Mix (not canned pumpkin)
3 packages cream cheese, at room temperature
¼ cup sugar *optional if you want a sweeter cake- I opted FOR the sugar
3 eggs, at room temperature
1 tsp vanilla
½ tsp cinnamon
½ tsp ginger
¼ tsp nutmeg
2 TBS cornstarch

In a large mixing bowl, beat cream cheese on low to med-low until creamy.
Add pumpkin and sugar- beat on medium until combined.
Beat in eggs, one at a time incorporating after each addition.
Mix in vanilla, cinnamon, ginger and nutmeg and corn starch.
Pour pumpkin filling into prepared crust, smooth top.
Place cheesecake in oven and bake for 1 hour.
At about 50 minutes check to see if cheesecake is done*.
Remove from oven and allow to cool in pan for at least an hour before refrigerating.
About 30 minutes into cooling, run knife around edge of cake to prevent cracking while cooling.
Allow cheesecake to cool for at least 3 hours in fridge (cover top with saran wrap), but for best results refrigerate over night before eating.

How to tell a Cheesecake is done:
1. The first indication of a "done" cheesecake are the sides- look for a lightly browned edge pulling away from pan.
2. Tap side of pan with knife or spoon or slightly shake cake. If cheesecake jiggles like jello (in one motion) then it is done. If you let it sit in the oven anymore it’ll become overdone.
3. Lightly press the top of the cake feeling for firmness.

For more tips on cheese-caking check out Baking911. They have everything from how to tell if a cheesecake is done and what to do if your cheesecake cracks to how to best cut a cheesecake... I found their tips extremely helpful, especially for a cheesecake newbie like myself!

 Happy Baking!

A little update on our move for those of you interested.. We got all moved in this weekend thanks to MM's family and while MM is busy hanging pictures and setting up closets, I'm staying busy in my new huge kitchen! Only down fall is we're still trying to get the internet working at our house..that means my posts might not be as frequent until we get it all figured out! I have a ton of recipes waiting for you though so don't worry :)

Thursday, August 19, 2010

'Choco-Nana-Nutter' Vanilla Pudding Pie

I got a little crazy with the chocolate syrup..
Yes, I just made up a word.. 'Choco-Nana-Nutter.'

Choco-Nana-Nutter (n): chocolate, banana and peanut butter (aka the best combination ever)

A few days ago one of my friends sent me a message to tell me about the Chocolate Pudding Pie she made to prove to her mom that she can cook.. if someone walked into my office while reading this little message they probably would have thought I was crazy, as I was smiling from ear to ear.

Why you ask? Because I love the feeling of being associated with sweets and desserts and cooking/baking adventures.

It makes me so happy to get calls and messages from friends regarding stories in the kitchen or baking questions.. just the other day MM's mom called me about zucchini bread..I like being the person people can turn to when they have questions like that...it makes me feel special, like I know something.

But back to the pudding pie! Although Darcy's intention was just to tell me a silly little story, she inspired me- I immediately started to think about making my own pudding pie when I got home from work.

Much to my dismay, chocolate pudding was no where to be found in my very full cupboards, but I did find a vanilla mix. Plain vanilla? that just wouldn't do.. I needed something more exciting than that.

I quickly got to making a graham cracker crust while the cranks kept turning for the perfect combination of ingredients for my pudding pie.. with chocolate on the mind I knew it had to be in there somewhere, but still I longed for more. I opened the cupboard and stared for a bit then moved onto the kitchen counter. The rest...was history.

Chocolate? check.
Bananas? check.
Peanut Butter? check.

'Choco-nana-nutter' Vanilla Pudding Pie
swEEts original


1 graham cracker crust (recipe below)
1 package of instant vanilla pudding
1 3/4 cup whole milk
1 cup semi-sweet chocolate chips
1/4 cup peanut butter
1 banana, sliced
chocolate syrup (optional)

Prepare graham cracker crust (can also be made a couple days in advance).
Prepare vanilla pudding according to package (using pie directions with less milk) and place in fridge to set and thicken.
Once your crust is cool and you pudding is set, it's time to make the chocolate layer.
Place chocolate chips and peanut butter in a small bowl and microwave for about 1 1/2 minutes, stopping to stir every 30 seconds, until chocolate is melted and mixture is smooth.
Pour chocolate-peanut butter mixture into pie crust and using a spatula, spread along crust.
Place banana slices on top of chocolate-peanut butter layer.
Finally, spoon in the pudding, using a spatula to smooth the top.
Garnish with extra slices of banana and chocolate syrup (optional).

Graham Crack Crust
Oven: 350 Bake Time: 20 minutes

1 sleeve graham crackers, crushed
1/4 cup sugar
1/3 cup butter, melted

In a bowl, combine crushed graham crackers, sugar and melted butter and mix until crackers start to stick together.
Press into lightly Pam coated pie pan.
Transfer to oven and bake for 20 minutes.
Allow to cool for at least 30 minutes before adding filling (I placed mine in the fridge)


As I whipped all of this together shortly after I got home from work,  MM was a little skeptical of the banana addition, but in one bite he just looked at me, mouth full, with that look.."awesome" was all I could make out as he munched on his piece of pie.

If you're looking for a quick dessert look no further..

Happy Baking!  

Sunday, July 4, 2010

Blueberry Pie ...for the 4th of July


Something red, Something white and now something blue...It's the 4th of July! 

The other day MM came home from work with 3 boxes of blueberries.

My first question: 'Blueberry on sale or something?'
'Nah...Blueberry Pie,' he responded as he rushed to the fridge.

A man who makes pies for fun? I can totally respect that. In fact, I LOVE that.

And so I give you on this wonderful fourth of July weekend...Blueberry Pie a la Mountain Man.

Blueberry Pie
Prep time: a few hours   
Oven: 425/350 Bake time: 40 minutes total

Crust:
3 cups AP flour
2 tsp sugar
3/4 tsp salt
1/2 cup butter, cold and cubed 
1/2 cup shortening, cut into chunks
2 tsp lemon juice
6 TBS ICE COLD water 

Place flour, sugar and salt in food processor and pulse a few times.

Add butter and shortening, a few chunks at a time, pulsing as you go. 
Sprinkle in lemon juice and continue to pulse, inhibiting the development of gluten.
Pulse until you reach a chunky mixture- Don't over mix!
Add half water and begin processing, adding in the rest as you go. Once incorporated, stop.
Dump dough out onto a lightly floured surface, giving the dough a quick knead forming into a solid ball.

Cut the ball in half and shape each half into a disc. Wrap in plastic wrap and refrigerate for about an hour.
After refrigeration, bring one of the dough discs to your lightly floured surface and roll out into a circle**. 
**There are many theories on rolling, but I find that rolling from the inside out and only going in a singular direction versus back and forth works best.
To make the move to the pie pan easier, fold the dough in half and then again (quartered). Once transfered to the pan unfold, smooth out and cut off excess hanging over the edges. 
Return to the fridge.

Blueberry Filling:
4-5 cups of blueberries
1/2 cup sugar
4 TBS corn starch
2 tsp lemon juice

In a small bowl combine sugar and corn starch, mixing well.
In a larger bowl, place rinsed blueberries and add lemon juice. Sprinkle sugar mixture, but make sure to reserve a bit for the end.
Using your hands, as spoons can damage your berries, mix well and pour into pie shell. Finish off with a sprinkling of remaining sugar.

Finished crust
Roll out remaining disc of dough just as you did the first.
This is where you have options for your finishing touches: A simple solid top is very easy and can be very elegant. I have also seen shapes cut out with a cookie cutter and places in layers on top which can be very festive. I however, love the challenge and intricacy of a lattice crust.

With the dough rolled out, cut 3/4 inch wide strips that are the length of your pie pan. I start from the middle and in one direction follow a simple over-under pattern by folding back one side of the dough strip when laying the next layer down. Continue until the entire top is covered and then crimp the edges.


Refrigerate for another 30 minutes while the oven preheats to 425. Just before baking, brush with a wash of 1 egg yolk and 1 tsp of cream and finished off with a sprinkle of sugar.

Bake at 425 for 20 minutes then tent with foil and bake at 350 for 20 minutes more.

The hardest part? Letting it stand and cool for 2 hours before you can dig in!

Happy Baking and Happy 4th of July!!