Showing posts with label holiday. Show all posts

Monday, July 4, 2011

Happy Birthday America!

Dear America,

In celebration of your birthday I baked you a cake, just like I do all my favorite people!

Last year we made a pie in your honor...


...but this year I wanted to make sure you had something extra special so I personally decorated a cake for you.


I know you won't be here to blow out the candles, but that's okay because we probably wouldn't be allowed to light them anyways. Texas actually put a ban on all things related to your fireworks (even sparklers are out of the question) but don't worry, we're still going to celebrate... just fireless.


You're pretty special you know that? It's not every birthday that we get a whole day off from work to celebrate, so thanks :)

XOXO,
  E


I hope everyone's day is filled with grilling, cold drinks and good friends!

Happy 4th of July!!

Monday, May 30, 2011

Bacon & Cheddar Muffins


I love long weekends.

There's just something about waking up on the Monday morning of a holiday weekend with a smile on your face, feeling like you've cheated the system with that extra morning to sleep in.

In true summer fashion our Memorial Day weekend was jam packed with sun filled adventures including the Austin Music and Wine Festival, lounging by the pool and a Sunday night BBQ with some of our favorites.

And everyone knows when you have plans all weekend long breakfast is one of the most important meals of the day because with so many plans you never know when your next meal will be.

I woke up Saturday morning craving a baked good, but wanting something savory at the same time.

Luckily,  I came upon this recipe for Bacon & Cheddar Muffins in an online Bisquick magazine and couldn't have been happier about the ease of preparation (and taste of course).


Bacon & Cheddar Muffins
recipe by Bisquick
Oven: 400 Bake time: 16-19 minutes
Makes 10 muffins or 5 large muffins

4 strips of bacon
1 egg
2 cups of Bisquick
3/4 cup of cheddar cheese
3/4 cup of milk
2 TBS butter, melted
1/4 tsp chili powder

Preheat oven to 400 and line muffin tin with paper liners.
In a large skillet, cook bacon until nice and crispy.
Remove from skillet, allowing bacon to cool, crumble and set aside.
In a large bowl lightly whisk egg.
Add Bisquick, milk, butter, and chili powder and mix until combined.
Fold in cheddar cheese and crumbled bacon.
Spoon batter into prepared muffin tin- filling each about 3/4 full.
Transfer to oven and bake 16-19 minutes or until muffins have lightly browned.
Allow to cool slightly before removing from pan.
Serve with eggs.


Do anything fun this weekend?

Happy Baking!

Monday, April 18, 2011

Cadbury Cream Egg Surprise Cookies


When I was a kid I used to give up candy for Lent.

But instead of focusing on the sacrifice part of the tradition, I looked at it as a means to hoard as much candy as possible the 40 days leading up to the Bunny's big day.

By the time Easter Sunday came around, I would have a bag full of candy waiting for me in my room...everything that I managed to save through various holiday parties at school and church- sneaky sneaky.

After my "sacrifice" was through, I would wake up and sneak a piece of candy before running downstairs to see what the Easter Bunny had brought us.

My favorite candy during the Lenten season, then and ever shall be, Cadbury Cream Eggs. I have to admit it takes me a little longer to finish an entire egg these days (thank goodness they make the mini ones now!), but I still look forward to getting a carton come spring.

Now that I have a blog I felt it was my duty to pay homage to my little creamy eggs of goodness and incorporate them into a cookie this Easter.


Cadbury Cream Egg Surprise Cookies
a swEEts original
Makes 12 cookies

1/2 cup butter (1 stick), softened
1/4 cup sugar
1 tsp vanilla
dash of salt
1 cup flour
12 pack of mini cadbury cream eggs
assorted sprinkles

Line baking sheet with parchment paper.
In a large bowl, cream butter, vanilla and sugar.
Add salt and flour, mixing until well combined and soft dough is formed (if you dough seems too sticky add a little more flour).
Unwrap your mini Cadbury Cream Eggs.


Roll a tablespoon of dough into a ball and flatten it with your fingers. Place an egg in the center of your dough.... 


...and gently press the remaining dough around the egg, until it's completely covered. 


Lightly roll in the palm of your hand to cover smoothly.
Once your egg is covered, roll in assorted sprinkles.


And place on prepared parchment paper.


Repeat until all your eggs have been covered, then place in fridge to chill for about 30 minutes.
With about 10 minutes left, preheat your oven to 350.
Place cookies in oven for about 10-12 minutes- these cookies won't really brown so just gently press into one to feel for doneness.
Allow to cool completely before sinking into.


Your little bunnies won't be able to keep their paws off these! 


Happy Baking!

Wednesday, March 16, 2011

Leprechaun Treats

One thing's for sure, St. Patrick will not go un-celebrated by us this year.

This past weekend we went up to Dallas to celebrate good ole St. Patrick in all his glory: a sea of green on Dallas' Greenville Street (somewhat like Savannah's River Street festivities) complete with green beer.


Tomorrow's celebration will be a little more subdued: lunch at the office complete with corned beef and cabbage and rye bread and these Leprechaun Treats...


And Friday we're having a little BBQ at the house in the Irishman's honor and to christen our new (green) smoker...


St. Patty is getting more love than Santa this year!

You don't even have to be Irish to appreciate this sweet and salty twist on an American classic.

These little Leprechaun Treats are sure to be eaten up amongst all the mischief that St. Patty's Day brings; not to mention, they're incredibly easy to whip up.


Leprechaun Treats
swEEts original
Fills a 9x13 baking pan

3 cups Rice Krispies Cereal
1 1/2 cups pretzel sticks (slightly crushed)
1 cup corn or rice chex
1 cup green m&ms
1 bag mini marshmallows
1/4 cup peanut butter
2 TBS butter, melted
3-4 drops of green food coloring

Spray a 9x13 baking pan with cooking spray and set aside.
In a large bowl, mix cereals, pretzels and m&ms.
In a large microwave safe bowl, heat marshmallows and butter for 2 minutes.
Stir in peanut butter and green food coloring until smooth.
Pour over dry ingredients and with a buttered spatula mix until combined.
Press mixture into prepared baking pan using a buttered or sprayed spatula.
Cool and cut into squares.

Looking for something else to make this shamrock shaking holiday?
How about some Guinness Bailey's Swirl Brownies?
Or perhaps Guinness Cake with Bailey's Buttercream?
And you can never go wrong with Irish Soda Bread.

*Please note that the above recipes were in the very beginning of my blogging so feel free to poke fun at the lack of photography skills.. the recipes are still delicious though I promise!

Monday, February 14, 2011

Valentine's Day Treats

Happy Valentines Day! 


Truth be told, V-day is not something that Mountain Man and I really celebrate...we don't have big dinner plans, I definitely won't be getting flowers or a box of chocolates and I will absolutely not be getting any jewelry- MM made it very clear I'd reached my diamond quota this year ;)

Despite the fact that I'm not particularly keen on a holiday that could potentially make some people feel pretty darn sad, I'll take any excuse to make cute and delicious treats.

This Valentine's Day I decided to go back to the good old days when it didn't matter if you had a significant other to get you something sweet and I set out to put a smile on everyone's face in the office with a little something special.

One of the girls in the office can't have gluten and I wanted to make something that everyone could enjoy, so as I browsed the aisles of Michael's I picked up some candy molds, a few bags of candy melts and lollipop sticks.


These lollipops couldn't be any easier (the directions are right on the package).. just melt, pour, stick, place in the fridge and voila! homemade candies.

But I didn't stop there.. I had a ton of cake left over from some projects over of the weekend (I can't wait to show you the final products!) so cake balls seemed the perfect choice.


With all the extra lollipop sticks I thought I'd give cake pops a go...

Lets just say that didn't go as planned... I have already admitted my cake balls need work- they never look as good as they should and I can never get them smooth! And now, with cake pops...well, put it this way, I'm no Bakerella and I should have read Carolyn's tips a little more closely to get them to work.

I couldn't get the sticks to stay in the cake balls for the life of me and the silly little things just kept falling apart so a few wasted cake balls later, I gave up and just went back to making cake balls. After my epic fail I went back and researched all thing cake pops (which I should have done from the beginning) and now I know where I went wrong.. so next time those cake pops are mine!

No matter what your plans today, flowers or not, I hope everyone has a lovely day full of sweets and treats :)

Happy Baking!

Thursday, November 18, 2010

Turkey Day Cupcakes


Can you believe Thanksgiving is next week?

This year is flying by I tell ya.. I feel like every year the months get shorter and shorter, the hours in the day disappear without a word and weekends come and go in the blink of an eye.

That being said, this is my favorite time of year. The leaves are changing (kind of), the weather gets cooler and what foodie doesn't love a holiday that revolves around food? Where it is absolutely OK to say yes to thirds, dessert is a must and the main goal of the evening is to stuff yourself until you fall asleep watching football!?...I can't wait!

To celebrate this joyous occasion I made some festive little Turkey Day Cupcakes.

I apologize ahead of time that I didn't take photos of the process, but I had to pick MM up at the airport so I was running out of time- but I'll try to explain as best I can. If you have any questions please don't hesitate to get in touch.


Turkey Day Cupcakes

Vanilla Butter Cake
Recipe from the Mermaid Bakery
Oven: 350 Bake time: 25-30 minutes
Makes 2 or 3 8inch cakes 

1 cup butter
2 cups sugar
4 eggs, at room temperature
2 3/4 cup AP flour
2 1/4 tsp baking powder
1/4 tsp salt
1 cup buttermilk
1 tsp vanilla extract

Preheat oven to 350. Prepare pans- grease and dust with flour- line the bottom with parchment paper.
In a large bowl, cream butter and sugar until light and fluffy.
Add eggs one at a time, beating after every addition. Mix in vanilla.
Whisk flour, baking powder and salt in a small bowl.
Alternate adding flour mixture and buttermilk to butter/sugar/egg mixture in two parts, beginning and ending with flour mixture.
Pour into prepared pans and bake for 25-30 minutes or until toothpick comes out clean and cake bounces back to touch.
Place on cooling rack for about 20 minutes before removing cakes from pan to continue cooling.

Chocolate Frosting
1/2 cup (1 stick) melted butter
2/3 cup cocoa powder
3 cups powdered sugar
1/3 cup milk
1 tsp vanilla

Melt butter in microwave. Stir in cocoa powder until combined. Slowly add powdered sugar, vanilla and milk beating on medium speed until light and fluffy. Add more milk if necessary.


Turkey Materials
Whoppers Malted Milk Balls
Banana Laffy Taffy
Wilton Candy Melts


Assembly
Feathers: Melt Wilton Candy Melts per directions on package. Cool for a few minutes and then place melted candy in piping bag or candy bottle. Using piping bag or bottle, make feather shapes on parchment paper. Cool completely- until feathers are good and hard.

Turkey Heads:
For the beaks- With hands slightly flatten Lafffy Taffy. Using a sharp knife, cut taffy into small triangles.
Using the warmed candy melts, place a small amount on flat part of taffy triangles and attach to malt balls. Allow taffy to set and candy to harden.
Once beak is set, use warmed candy melts and pipe small dots for turkey's eyes.
(I had a left over tube of red frosting so I made the little gobblers, but if you don't have it don't worry)

Pipe cupcakes with chocolate frosting. Place turkey head on top of piped frosting. Place feathers behind head and pipe a small amount of chocolate frosting behind feathers for stabilization and a little tail.

What are you doing for Turkey Day??

Oh and did I mention that I'm flying with another wedding cake this weekend? 
Well if not, I'm flying with another wedding cake this weekend so be on the lookout..
this time around is a little different, but I'm traveling to Savannah again. I would show you a sneak peak, but I know the bride reads here and her cake is a surprise!

Have a great weekend everyone.. see you Monday!
Happy Baking!! 

Sunday, July 4, 2010

Blueberry Pie ...for the 4th of July


Something red, Something white and now something blue...It's the 4th of July! 

The other day MM came home from work with 3 boxes of blueberries.

My first question: 'Blueberry on sale or something?'
'Nah...Blueberry Pie,' he responded as he rushed to the fridge.

A man who makes pies for fun? I can totally respect that. In fact, I LOVE that.

And so I give you on this wonderful fourth of July weekend...Blueberry Pie a la Mountain Man.

Blueberry Pie
Prep time: a few hours   
Oven: 425/350 Bake time: 40 minutes total

Crust:
3 cups AP flour
2 tsp sugar
3/4 tsp salt
1/2 cup butter, cold and cubed 
1/2 cup shortening, cut into chunks
2 tsp lemon juice
6 TBS ICE COLD water 

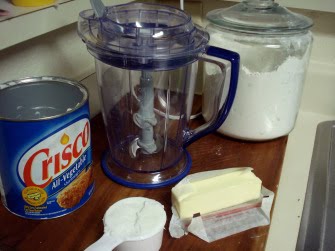
Place flour, sugar and salt in food processor and pulse a few times.

Add butter and shortening, a few chunks at a time, pulsing as you go. 
Sprinkle in lemon juice and continue to pulse, inhibiting the development of gluten.
Pulse until you reach a chunky mixture- Don't over mix!
Add half water and begin processing, adding in the rest as you go. Once incorporated, stop.
Dump dough out onto a lightly floured surface, giving the dough a quick knead forming into a solid ball.

Cut the ball in half and shape each half into a disc. Wrap in plastic wrap and refrigerate for about an hour.
After refrigeration, bring one of the dough discs to your lightly floured surface and roll out into a circle**. 
**There are many theories on rolling, but I find that rolling from the inside out and only going in a singular direction versus back and forth works best.
To make the move to the pie pan easier, fold the dough in half and then again (quartered). Once transfered to the pan unfold, smooth out and cut off excess hanging over the edges. 
Return to the fridge.

Blueberry Filling:
4-5 cups of blueberries
1/2 cup sugar
4 TBS corn starch
2 tsp lemon juice

In a small bowl combine sugar and corn starch, mixing well.
In a larger bowl, place rinsed blueberries and add lemon juice. Sprinkle sugar mixture, but make sure to reserve a bit for the end.
Using your hands, as spoons can damage your berries, mix well and pour into pie shell. Finish off with a sprinkling of remaining sugar.

Finished crust
Roll out remaining disc of dough just as you did the first.
This is where you have options for your finishing touches: A simple solid top is very easy and can be very elegant. I have also seen shapes cut out with a cookie cutter and places in layers on top which can be very festive. I however, love the challenge and intricacy of a lattice crust.

With the dough rolled out, cut 3/4 inch wide strips that are the length of your pie pan. I start from the middle and in one direction follow a simple over-under pattern by folding back one side of the dough strip when laying the next layer down. Continue until the entire top is covered and then crimp the edges.


Refrigerate for another 30 minutes while the oven preheats to 425. Just before baking, brush with a wash of 1 egg yolk and 1 tsp of cream and finished off with a sprinkle of sugar.

Bake at 425 for 20 minutes then tent with foil and bake at 350 for 20 minutes more.

The hardest part? Letting it stand and cool for 2 hours before you can dig in!

Happy Baking and Happy 4th of July!!


Saturday, July 3, 2010

Patriotic Muffins


Fourth of July weekend means paying tribute to the good ole US of A with lots of red, white and blue ...and don't forget barbeque and fireworks!

I don't know if you're aware, but muffins are very proud to be American's and as a means to show their patriotism they wanted to take this opportunity to display their red and white (something blue will be debuting tomorrow so stay tuned).


I used my go-to muffin recipe as a base and then split the batch in half to create two different variations- Strawberry and White Chocolate Macadamia. The recipe for the base is to follow, but the direction you go after that is totally up to you. The great thing about this muffin recipe is that it really leaves the creativity up to you... any thoughts on other add-ins to make these even more patriotic??


Go-to Muffin Base
Oven: 375 Bake time: 25 min
Makes 1 dozen muffins

1 cup white whole wheat flour (you can also just use 2 cups AP flour)
1 cup AP flour
1/4 cup brown sugar
1/4 cup white sugar
1 tsp baking powder
1/2 tsp baking soda
1/4 tsp salt
sprinkle of cinnamon
1/3 cup canola oil
1 egg
1 cup buttermilk (or whole milk)
1 tsp vanilla extract

Preheat oven to 375.
Spray muffin pan with cooking spray and set aside.
In a large bowl, whisk flours, sugars, baking powder, baking soda, salt and cinnamon.
In a small bowl, lightly beat egg, oil, buttermilk and vanilla.
Pour wet mixture into dry and with a wooden spoon mix until incorporated.
(This is where you would fold in your add-ins if you so choose)
Spoon batter into muffin pan, filling each 2/3 the way full.
Sprinkle with streusel topping.
Bake for 25 minutes.

Streusel Topping
1/4 cup brown sugar
2 TBS AP flour
2 TBS cold butter, cubed

In a small bowl combine sugar and flour. Using a fork mash butter into mixture, until chunky consistency is reached. Place in the freezer for a few minutes before using to top muffins.

Strawberry Muffins
1 recipe muffin base
1 cup chopped strawberries
1 recipe streusel topping

Prepare batter, and fold chopped strawberries until distributed.
Sprinkle streusel topping over muffins.
Transfer to oven and bake for 25 minutes.
Remove from oven and transfer to cooling rack for about 15-30 minutes before removing from pan.

White Chocolate Macadamia Muffins
1 recipe muffin base
1/2 cup white chocolate chips
1/2 cup chopped macadamia nuts
1 recipe streusel topping

Prepare batter, and mix in white chocolate chips and chopped macadamia nuts until distributed.
Spoon batter into muffin pan, filling each about 2/3 way full.
Sprinkle with streusel topping.
Transfer to oven and bake for 25 minutes.
Remove from oven and transfer to cooling rack for about 15-30 minutes before removing from pan.

These muffins are just the thing to start us off for a weekend of good food, good friends and fireworks. This afternoon we're driving about an hour with some friends to try out a famous BBQ place...can you tell we like our food? Anyone out there have some fun plans this weekend?? 


Happy Baking!