Sunday, March 28, 2010

Sweet Potato Scones


This morning I woke up craving something good... Sunday's are normally my pancake day, but today I wanted something different. Ever since St. Patty's Day and watching Alice in Wonderland I've been craving scones (pronounced scon by the silly brits) and so.. this morning's post was created.

That's right.. get your serving of veggies for breakfast with these scrumptious Sweet Potato Scones. I even tried to make them pretty healthy (I'm trying, I'm trying) The way I see it, breakfast should be a nutritious part of your day so why not at least attempt to make breakfast baked goods a little better for you by sneaking in some healthy ingredients? Happy Andrea!?

Anyways, these bad boys are chock full of whole wheat flour, pureed sweet potatoes and agave nectar instead of sugar. However, there are still some yummy ingredients (yummy= not so good for you) because a scone just wouldn't be a scone without at least a little butter and a glaze is necessary to keep your scones good and moist for more than 2 days.
This recipe makes 4 large scones or 8 mini scones because I didn't want a dozen scones when I was baking just for myself (1 month till MM gets here!!).

Sweet Potato Scones
A swEEts original
Oven: 425 Bake Time: 15-17 minutes
1 cup whole wheat flour
3/4 cup AP flour
1/4 cup butter
1 tsp baking powder
1/2 tsp baking soda
1/2 tsp salt
1 egg
1/4 cup agave nectar
1 sweet potato (mashed)
1/2 TBS cinnamon
1/4 tsp nutmeg
2 TBS maple syrup
2 TBS milk for brushing
1 TBS brown sugar for sprinkling

Glaze: 1 TBS butter, 2 TBS brown sugar, 2 TBS maple syrup

Preheat oven to 425 degrees.
Peel sweet potato and cut into small chunks. Place in small microwave-safe bowl and heat for about 5 1/2 minutes (I used the potato button).
While waiting for your potato get your flour, salt, baking powder, baking soda and butter in the food processor and pulse until just combined then move mixture into large mixing bowl.
Once your potato is heated and soft, place in food processor adding agave nectar, cinnamon, nutmeg, and maple syrup- puree until smooth.
Using a paddle attachment, add egg and potato mixture to flour mixture and mix until just combined. Your mixture should be smooth but firm- if it is too sticky add a little more flour.
Turn out mixture to a floured surface and knead dough for a few minutes, incorporating more flour if it is still too sticky. Flatten dough into a circle that is about 1 inch thick and cut into triangles (4 large or 8 small).
Transfer scones to a baking pan (I used a baking stone) brush with milk and sprinkle with brown sugar.
Bake for 15-17 minutes.

While scones are baking in small bowl combine butter, brown sugar and syrup for glaze. Place in microwave for about 1 minute.

Once scones are out of the oven, using a pastry brush, brush each with glaze mixture.

Enjoy with your morning cup of coffee. :)

Happy baking!!


'Healthier' options:
-You could always use just whole wheat flour although I think that makes for very dense and chewy baked goods which is why I used a combination of flours.
-You don't have to brush each scone with the glaze, (although I HIGHLY suggest you do) but like I mentioned before it will help keep the scones fresh for about 4 days if kept in an airtight container and also lends to a yummy sweetened crust.

Saturday, March 27, 2010

The Adventures of The Daring Bakers March Challenge!

Ok, this is my new favorite thing.. I've mentioned before that I'm a huge dork and if you know me at all I'm  sure you would agree, but when I discovered The Daring Kitchen and the Daring Baker Challenges I was as giddy as a school girl! I stumbled upon the whole thing one night while checking out the blog Fahrenheit 350  and noticed a series of recipes...intrigued I went to check out the website and immediately fell in love! Challenges, secrets, bloggers and an excuse to try out new recipes- OH MY I was excited! Basically, every month The Daring Kitchen posts a secret recipe known as the Daring Baker Challenge that is hosted by a different blogger each time.  The secret recipe is not something that is taken lightly.. there was an application process and a waiting period as well to make sure I was serious about these challenges! I couldn't love it any more. At the first of every month a new challenge is posted and you have until the 27th of that month to make the dish. Although you can make it any time during that time, there are strict rules to not let the cat out of the bag until the 27th. Throughout the month everyone shares their adventures, tips and tricks, via secret forums and then at the end of the month you can check out everyones creations on their various blogs (this is the excited blogger geek coming out).

Since I didn't discover The Daring Kitchen till the middle of February, I had to wait till the March Challenge to participate, but the time has come!

The 2010 March Daring Baker's challenge was hosted by Jennifer of Chocolate Shavings. She chose Orange Tian as the challenge for this month, a dessert based on a recipe from Alain Ducasse's Cooking School in Paris.

 Sooo without further a do.. DUN DUNNA DUUUNN (hum it to yourself)

ORANGE TIAN


This dessert was quite a process...there were quite a few steps involved, but thankfully I broke it down and made some in advance. I was also excited to finally get to use my new kitchen scale :) I made sure to monitor my process throughout the whole thing. I actually ended up making a few personal sized portions and one large 'family style' portion that I could bring to the dinner party I was attending. I apologize in advance for the family style photos, as I took them at the party with lack of any good lighting! 

Step #1 The first thing I had to do in all of this was make my own Orange Marmalade... did I mention that I love Orange Marmalade? can't get enough of that good stuff.. and now that I know how to make it I think that it is definitely going to be something made again. Talk about a process though.. blanching oranges 3 times is not quick...


Marmalade
Freshly pressed orange juice ¼ cup + 3 tablespoons; 3.5 oz; 100 grams
1 large orange used to make orange slices
cold water to cook the orange slices
pectin 5 grams
granulated sugar: use the same weight as the weight of orange slices once they are cooked
Finely slice the orange. Place the orange slices in a medium-sized pot filled with cold water. Simmer for about 10 minutes, discard the water, re-fill with cold water and blanch the oranges for another 10 minutes.
Blanch the orange slices 3 times. Use a new batch of cold water every time when you blanch the slices. Once blanched 3 times, drain the slices and let them cool. Once they are cool enough to handle, finely mince them (using a knife or a food processor). Weigh the slices and use the same amount of granulated sugar . If you don’t have a scale, you can place the slices in a cup measurer and use the same amount of sugar. In a pot over medium heat, add the minced orange slices, the sugar you just weighed, the orange juice and the pectin. Cook until the mixture reaches a jam consistency (10-15 minutes).
Transfer to a bowl, cover with plastic wrap and put in the fridge 

Step #2 The first layer of this bad boy was segmented oranges.. pretty much if I never have to segment another orange in my life I will not lose any sleep. This was one of the most tedious parts of the recipe that required literally slicing the small pieces of orange out of the whole so that there was no skin. At the end of it all I had a long of orange segments, a lot of orange juice (in the bowl AND on the counter) and a pile of skin.

Orange Segments
You need 8-10 larger oranges. Cut segments over a small bowl to keep juice. As you cut, place the segments in the juice.


Step #3 After all those orange segments were left to soak in their juice the Pate Sablee was to be made- just think sugar cookie and an excuse to use my Ninja (Thanks Mrs.Sanderson :) )

Pate Sablee

2 medium-sized egg yolks at room temperature
granulated sugar 6 tablespoons + 1 teaspoon; 2.8 oz; 80 grams
vanilla extract ½ teaspoon
Unsalted butter ¼ cup + 3 tablespoons; 3.5 oz; 100 grams ice cold, cubed
Salt 1/3 teaspoon; 2 grams
All-purpose flour 1.5 cup + 2 tablespoons; 7 oz; 200 grams
baking powder 1 teaspoon ; 4 grams
Directions:
Put the flour, baking powder, ice cold cubed butter and salt in a food processor fitted with a steel blade. In a separate bowl, add the eggs yolks, vanilla extract and sugar and beat with a whisk until the mixture is pale. Pour the egg mixture in the food processor. Process until the dough just comes together. If you find that the dough is still a little too crumbly to come together, add a couple drops of water and process again to form a homogenous ball of dough. Form into a disc, cover with plastic wrap and leave to rest in the fridge for 30 minutes. Preheat your oven to 350 degree Fahrenheit. Roll out the dough onto a lightly floured surface until you obtain a ¼ inch thick circle. Using your cookie cutter, cut out circles of dough and place on a parchment (or silicone) lined baking sheet. Bake for 20 minutes or until the circles of dough are just golden.

Step #4 Giant cookie in the oven... caramel sauce was next. With this I ran into some problems and because of my frustration I didn't take any pictures. I've made caramel before so I don't know what I was doing wrong but for some reason the sugar was just not having it this go around.. I ended up with two batches of semi-OK caramel sauce, sore hands from squeezing out so much orange juice and 2 pans with hardened caramelized sugar stuck to the bottom...

Caramel
granulated sugar 1 cup; 7 oz; 200 grams
orange juice 1.5 cups + 2 tablespoons; 14 oz; 400 grams
Place the sugar in a pan on medium heat and begin heating it. Once the sugar starts to bubble and foam, slowly add the orange juice. As soon as the mixture starts boiling, remove from the heat and pour half of the mixture over the orange segments.
Reserve the other half of the caramel mixture in a small bowl — you will use this later to spoon over the finished dessert. When the dessert is assembled and setting in the freezer, heat the kept caramel sauce in a small saucepan over low heat until it thickens and just coats the back of a spoon (about 10 minutes). You can then spoon it over the orange tians.


Step #5 Homemade marmalade whipped cream.. tooo easy. 

Whipping Cream
Heavy whipping cream 1 cup; 7 oz; 200 grams
3 tablespoons of hot water
1 tsp Gelatine
1 tablespoon of confectioner's sugar
orange marmalade (see recipe above) 1 tablespoon
In a small bowl, add the gelatine and hot water, stirring well until the gelatine dissolves. Let the gelatine cool to room temperature while you make the whipped cream. Combine the cream in a chilled mixing bowl. Whip the cream using a hand mixer on low speed until the cream starts to thicken for about one minute. Add the confectioner sugar. Increase the speed to medium-high. Whip the cream until the beaters leave visible (but not lasting) trails in the cream, then add the cooled gelatine slowly while beating continuously. Continue whipping until the cream is light and fluffy and forms soft peaks. Transfer the whipped cream to a bowl and fold in the orange marmalade.


All of these ingredients then had to take a break in the fridge.. some overnight.  Then the assembly was ready to take place... the process was as follows: Stage 1. Drain orange segments that had been soaking all night. Stage 2. In the bottom of the cookie cutter (pan, or both) arrange segmented oranges for first layer. Stage 3 After oranges had been arranged a layer of the whipped cream was added. Stage 4. The final layer was the marmalade coated pate sablee placed marmalade side down on the whipped cream and placed in the freezer for setting.

After soaking all night, these lil segments needed to be drained
layer of orange segments for my 'family style'
single sized portion going into cookie cutter
Family style set and ready to eat!

Don't let my post fool you.. this dessert was no easy task. When I woke up Friday morning before work to put this all together I realized that I didn't have enough orange segments for the size pan I had originally intended and since I used up all my oranges to attempt the caramel sauce multiple times I was left scrambling for a smaller pan. Of course, because of my switch that meant my pate sablee was too large as well so I had to shave of some of the sides leading to a cracked and broken cookie- thankfully it ended up on the bottom of the dessert so no one had to know!

All in all, after much frustration in the kitchen at hours in the morning when no dessert should be assembled, when the process was all said and done I had a wonderful Orange Tian ready for devouring at the dinner party.... and it was a hit!! :)


Sunday, March 21, 2010

St. Patty's Day Celebration

Just a warning: I did a lot of cooking/baking this past weekend- don't miss the Guinness Brownies on the previous post! This post is going to have a little bit of everything, but most importantly a wonderfully delicious Irish Soda Bread recipe courtesy of my favorite roommate from grad school.

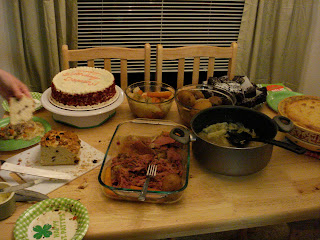
Unfortunately, we had some things planned at work last week that didn't really allow us to have as much fun as we were hoping on St. Patrick's Day (since it was on a Wednesday). So to make up for our lack of celebration on Wednesday, we had a dinner party/St. Patrick's Day celebration Friday night complete with all the Irish fixins: corned beef and cabbage, cottage pie, Irish soda bread, and Guinness brownies. One of the girls at work also asked me to make her husband a Red Velvet Cake for his birthday so that made the menu as well!


I think I mentioned before that Mountain Man was in town this past week (only a few more weeks before he's here for good!) and it worked out perfectly because he was around to get the food going early Friday morning. It's great because he loves to cook and bake probably as much as I do, if not more- believe it or not- and we absolutely love to entertain and have friends over for dinner. Having made Darren's cake the night before and the main dishes taken care of  by the time I got home from work (got to love crock pots!) all that was left to do was the Irish Soda Bread and brownies.

My roommate in grad school was and is St. Patrick's biggest fan. Last year she made the best St. Patty's Day feast, topped off with Guinness Ice Cream Floats (definitely not as good as we had hoped they would be haha). Of course when I decided to have everyone over for dinner I knew I had to have her recipe for Irish Soda Bread and thankfully she shared the family recipe with me :)

So without further ado...


Irish Soda Bread
The Ryan-Way recipe
Oven: 400 degrees Bake time: 35 minutes

4 1/2 cup AP flour
2 TBS sugar
1 tsp salt
1 tsp baking soda
1/2 tsp baking powder
3/4 cup raisins
2 tsp caraway seeds (optional)
2 cups buttermilk

Mix all dry ingredients together. Once combined, stir in raisins.
Add buttermilk. Mix with wooden spoon, then use hands when dough gets too sticky to stir.
Knead. Form in shape (MM chose to make it a shamrock) and place on lightly greased baking sheet or parchment paper. Brush with beaten egg, cut slits.


Bake 35 minutes and cool at least 20 minutes before serving.

After a full night of beer, laughter and food, the dinner was a success. Everyone left extremely full and happy. I love Good food and Good friends.

Guinness & Bailey's Swirl Brownies

 
Well, well, well... Guinness and Bailey's meet again in these delicious gooey brownies! Although I already had dessert taken care of with the birthday cake I made for Darren, I wasn't satisfied with just one option for my St. Patty's Day celebration dinner. While at work Friday afternoon I started thinking about all the Guinness in my fridge, the bottle of Bailey's in my liquor cabinet, and the left over cream cheese I had from the Cream Cheese Icing from Darren's Red Velvet Cake and it came to me.. Guinness and Bailey's Swirl Brownies.  Thankfully I got out of work a few hours early, rushed home and through these bad boys together right after making the Irish Soda Bread.

These brownies came out perfectly gooey with the subtle hint of Guinness, just like the cake I made a few months back. Although the Guinness Cake is equally delicious, these brownies were the perfect bite size and the Bailey's cream cheese swirl added a wonderful flavor combination to the very rich stout brownie.

Guinness Brownies
Oven: 350 degrees Bake time: 30-35 minutes

1 cup Guinness
1 stick butter
3/4 cup cocoa
1 1/2 cups sugar
2 eggs
2 tsp vanilla extract
1 1/3 cup flour
1/4 tsp salt
1 tsp baking soda
1/2 tsp baking powder

Bailey's Cream Cheese
4 oz. cream cheese (room temperature)
1/4 cup milk
2 TBS Bailey's
1 TBS flour
1 cup powdered sugar

Brownies:
Simmer beer and butter. Once butter has melted add cocoa and mix until smooth. Remove from heat.
Whisk flour, sugar, baking soda, baking powder and salt.
Beat eggs and add to beer mixture.
Add flour mixture to wet mixture.
Pour into prepared pan.

Swirl:
In a large bowl, beat cream cheese, milk, Bailey's, flour and sugar until smooth.
Spoon mixture in horizontal lives over brownie batter.
Use a knife and swirl mixture into batter.
Transfer pan to oven bake for 30 minutes.

Let brownies completely cool before cutting into. Dust with powdered sugar before serving.

Happy Baking!

Thursday, March 18, 2010

Dulce de Leche Decadence


About a month ago it was Mountain Man's birthday so instead of sending him something in the mail (knowing it would take at least a week to make it to GA) I decided to wait till he was coming to visit to make him his birthday cake. Last year I set the bar pretty high as far as birthday cakes go when I made a cake for/of him and his brother climbing a mountain- complete with little fondant replicas of themselves. I was very happy with the way it turned out and I think Mountain Man and his brother were pretty satisfied as well :) 

Of course, this year I knew I had to make something good, but instead of going with something eye catching I decided to make something super tummy worthy (not that the other cake didn't taste good as well). Mountain Man definitely likes his fair share of Mexican food and goodies, so when I came across the recipe for a Mexican Chocolate Cake (thank you Betty) I knew it was going to be a winner. It also went perfectly with my new obsession of Dulce de Leche which I've been trying to incorporate into something since returning from Miami. When all was said in done I had figured it out.. Mountain Man would be getting surprised with a Dulce de Leche filled Mexican Chocolate Cake covered in Chocolate Ganache, which we later went on to call Dulce de Leche Decadence. So let's break this down..

First off, you might be thinking, well what exactly makes a chocolate cake a Mexican chocolate cake? It's not like Mexico is really known for their chocolate?? but what they are known for is adding a little cinnamon to their chocolate. The first time I actually ever had this glorious combination was when I was much younger. My best friend at the time was part Mexican and her mother made the best hot chocolate- which of course contained cinnamon. I can still remember coming in for snacks one cold afternoon and watching her mother make us hot chocolate on the stove top with warm smell of cinnamon and chocolate simmering in the sauce pan. The next time I was really reminded of this wonderful combo was at Mountain Man's house one afternoon as I searched for something to pour over my ice cream- courtesy of a little bottle of Nestle's Abuelita's Chocolate Sauce.

Dulce de Leche, or the creamiest, most wonderful caramel ever, is also one of the easiest things ever to make. It also has the shortest ingredient list of all time- one can of condensed milk. That's it.. I never knew dulce de leche was that easy!? And it's just so good... I'm thinking about just having it on hand from now on to pour over top ice cream or anything for that matter.

And what better to cover an already amazingly rich cake than with chocolate ganache?

Mexican Chocolate Cake
recipe from none other than Ms. Betty Crocker
Oven: 350 Bake time: 35 minutes
Yields 2 round cake pans*

3/4 cup hot brewed coffee
1/2 cup unsweetened baking cocoa
3 tsp ground cinnamon
2 cups AP flour
1 tsp baking powder
1/2 tsp baking soda
3/4 cup butter
1 3/4 cups sugar
3 eggs
3/4 cup buttermilk
2 tsp vanilla

Heat oven to 350. Prepare cake pans- grease and flour.
Beat coffee, cocoa and cinnamon with a wire whisk until smooth-set aside until mixture cools a little bit.
In another bowl mix flour, baking powder, and baking soda.
In a large bowl (love my kitchen aid) beat butter and sugar until creamy. Add eggs one at a time, beating after each addition. 
Stir buttermilk and vanilla into coffee mixture.
Starting and ending with flour mixture alternate with coffee mixture into butter mixture. Beat until all ingredients are combined and batter is smooth.
Pour into prepared pans and bake for about 35 minutes or until toothpick comes out clean. Cool cakes in the pan for 10 minutes before removing them and leaving to cool completely.
 *I actually used a loaf pan for this cake because I was tired to making only round cakes. It still turned out, but if you want to do this you need to increase your baking time about 20 minutes more or so.

While the cakes are cooling, its time to make the filling.


Dulce de Leche
Increase oven temperature to 425. Pour one can of sweetened condensed milk into a glass baking pan and cover with foil. Place the filled baking pan in a larger pan and fill the larger pan with water just till about halfway up the pan that is filled with the milk. You're creating a water bath for the milk so that it doesn't burn. Place the two pans in the oven and bake for at least an hour. You might want to check on it about half way through to see if more water needs to be added to the outside pan- you don't want your milk to burn! After about an hour, check to make sure your condensed milk has become a golden amber or browned a bit (if it hasn't give it a few more minutes) and remove from oven. Once it's cooled, mix with a whisk until smooth.

Chocolate Ganache
1 bag semi-sweet chocolate morsels
2 TBS butter
1/2 cup heavy whipping cream *add more to make thinner/pourable

In a saucepan, heat heavy cream until hot and mix in chocolate and butter, whisking until smooth. Remove from heat.
*Don't start to make your ganache until you're just about ready to pour it over your cake.

Assembly:
1. No matter how many layers you choose to use, round or rectangle or square, always remember to level off your layers!
2. Place your first layer on a cooling rack (I should have done this, but instead ended up with a mess) and spread a good amount of dulce de leche over top. Don't worry if it starts to ooze out a little bit. Repeat process with other layers.


3. Once you last layer of cake is placed on top.. get your warm ganache and pour it over top your cake, letting the ganache fall over the edges of the cake. When you feel like you've got a good layer, smooth out the sides with the flat end of a butter knife or spatula. If you're not satisfied with the smoothness (I never am) wait for this layer of ganache to cool and then pour another layer on.. I mean who doesn't want double the chocolate anyway!?
Let the ganache cool and harden over the cake before serving.


The aroma of cinnamon and chocolate baking in the oven is unlike any other and you will most definitely not be disappointed with this cake. Just to show you what I'm talking about, I'll share this story with you: MM's parents came to visit this early this week. Before we went out to dinner Tuesday night his mom and I indulged in a small piece of cake (as an appetizer of course) and she loved it. When we got back from dinner she asked for another to take on the road with them as they made their way back down the road. Then, when his brother came into town last night he informed me that she asked for another piece upon his return :)

Happy Baking!


Sunday, March 14, 2010

Zucchini Bread...the healthy way.


If you know me at all or you've followed any of the blog then you know- when I bake I don't usually go the healthy route. I mean don't get me wrong, as far as meals are concerned I maintain a pretty healthy diet, but when it comes to sweets.. well those rules don't apply. If I'm baking then I pretty much go the Paula Deen way: sugar is good and butter is better.  I honestly don't know how Vegan's do it.. no eggs, no butter...no milk?! I will admit, my dining hall in undergrad made some fantastic Vegan cinnamon oatmeal cookies... but still... sweets aren't meant to be healthy that's why they're sweets!

All that being said, when I got the craving for Zucchini Bread I decided to go the healthier road. (Andrea you will/should be proud) I also intended to find something that I could easily make Gluten-Free, because my boyfriends parents are coming into town and I always try to make something for his father whenever we get to visit.

Since this Zucchini Bread was done the healthy way, I used whole-wheat flour and substituted apple sauce for butter (sigh) but the one thing I couldn't force myself to do was use Splenda, instead I did a combo of brown and white sugar.  And of course I made the second loaf with Gluten-Free All Purpose Flour. While at the grocery store I ended up having to buy a huge bag of whole-wheat flour so I'll probably be trying out some different "healthier" recipes in the near future. Who knows, maybe I'll see the light??... but don't hold your breath (sorry Andrea).

Zucchini Bread
Oven: 350 Bake Time: 1 hour
Yields 2 loaves

1 cup unsweetened apple sauce
3 eggs
1 cup brown sugar
3/4 cup white sugar
2 tsp vanilla extract
2 1/2 cup grated zucchini (about 1 1/2 large zucchinis or 2 smaller ones)
3 cups whole wheat flour* or 3 cups Gluten Free AP flour
1 tsp salt
1 tsp baking powder
1/2 tsp baking soda
2 TBS cinnamon

Combine apple sauce, eggs, sugar, vanilla and zucchini.
Whisk flour, salt, baking soda, baking powder and cinnamon.
Add flour mixture to wet mixture and mix till combined.

*I actually split the recipe so I could make 1 loaf whole wheat and 1 loaf gluten free. After I combined the wet ingredients I transfered half to a different bowl (the wet ingredients make almost exactly 4 cups of mix so it was easy to divide into two bowls). I then made a mix of 1 1/2 cups whole wheat flour, 1/2 tsp baking powder, 1/4 tsp baking soda, 1 tsp cinnamon, and a dash of salt and added it to one bowl of wet. I did the same for the gluten free batch.

Pour batter into two prepared loaf pans (buttered and floured) and bake for an hour at 350.


I will admit, the bread turned out pretty yummy and I did feel a little bit better about myself as I ate two slices for breakfast this morning...but I wonder how much better it could have been with butter and regular flour?? :)

And I'll have to get back to you about the outcome of the Gluten-free loaf.. I didn't want to cut into it before Mountain Man's dad got to try some!

Happy Baking!

Thursday, March 11, 2010

Cherry & Chili Chocolate Cookies

I know what you're thinking... cherry, chili and chocolate? One of those things doesn't belong, right? Chili powder isn't supposed to be in baked goods!? Well, you're wrong and this cookie will prove it to you!  

If there is always one thing I can expect in my Christmas stocking its chocolate. But this year my mom didn't just get me the normal Lindt Dark Chocolate Truffles, instead I was introduced to Lindt Creations: Cherry & Chili. I went back and forth about what to expect.. was it going to be weird? a spicy chocolate? It just doesn't make sense.. but then, one bite later, I was sold. The hint of chili combined with the sweet cherry filling was a perfect ending to a wonderful piece of chocolate. 

I knew I wanted to use this combination in a cookie. Then, the other day it came to me as I eyed the jar of cherry jam I had left over from the Lemon Whoopie Pie filling I made for Ashley a few weeks ago. I also just happened to have some of the chocolate in my pantry. So the adventure began :)

Cherry and Chili Chocolate Cookies
A swEEts Original
Oven: 350 degrees Bake Time: 12 minutes
Yields about 24 cookies

1 stick softened butter
1/2 cup white sugar
1 egg
1/4 cocoa powder
1/4 tsp cayenne chili pepper powder
1 tsp vanilla extract
1/4 tsp salt
1/2 tsp baking powder
1/4 tsp baking soda 
1 1/2 cup AP flour
1/2 cup cherry jam
6 pieces of Lindt Creations: Cherry & Chili, chopped*

In a small bowl whisk flour, baking powder, baking soda, and salt.
If using a standing mixer use a paddle attachment and beat butter, sugar, and egg.
Mix in cocoa powder, cayenne pepper, and vanilla extract.
Add flour mixture and mix until combined.
Roll about a tablespoon (basically one spoonful) of dough into a ball. Place balls on parchment paper lined baking sheets.
Once dough has been placed on the baking sheets, poke a hole into the ball until you just about hit the baking sheet- I used the end of a rounded knife handle.
Fill each hole with cherry jam.

Pop your jam filled cookies to the oven and bake for 15 minutes.
Transfer the baked cookies to a cooling rack.

In a double boiler, melt the chopped chocolate mixing constantly until smooth. *If you can't find the Lindt Creations: Cherry & Chili, you could always melt a dark or semi-sweet chocolate of your choice. To get the cherry and chili flavor, once the chocolate is melted add a spoon full of cherry jam and a pinch of chili powder.

Drizzle the melted chocolate over each cookie and leave on the cooling rack for chocolate to cool.


If you can't wait for the chocolate to cool, I won't judge.. I didn't :)

Just another adventure...Happy Baking! 


Saturday, March 6, 2010

Hungry? Why wait...Snickers Cake.


Of course as Friday approached my mind raced with ideas for the latest cake creation. Thankfully, as I was prepping dinner one night I noticed some miniature Snickers bars in my candy jar (yes, I have a candy jar) and it dawned on me.. how awesome would it be to have a Snickers bar in cake form!? So I started brainstorming.. I had to make sure each component of the Snickers was replicated somehow in this cake: the fluffy part (what is that anyway?), the gooey caramel, the peanuts and of course the chocolate coating. Of course, you can't recreate perfection and nothing comes out exactly the way you plan it, so even though I tried to duplicate the flavors as close as possible, my culinary liberties lead me in some different directions. My mousse came out a little richer and darker than I originally had in mind, but in the end I think the bittersweet chocolate added a little something to a rather sweet creation. I should have known better using bittersweet chocolate, but hey, that's why these are adventures! That being said, I think the cake and all its fillings do a good job in trying to live up to the glorious candy bar that is Snickers.

I decided to go with a Yellow Cake base and again, for time sake, cheated.. I know, I know but I was thinking about it and from now on I'm calling this sort of cake semi-homemade like Sandra Lee does on the Foot Network; instead of Semi-Homemade with Sandra Lee it'll be Semi-Homemade with Evan B.

So the Snickers Cake consisted of a semi-homemade Yellow Cake base with a fully homemade Chocolate Mousse filling, Ooey-Gooey Caramel complete with chopped peanuts of course and covered in Chocolate Buttercream.

Semi-Homemade Yellow Cake I've used this recipe before so just click the link to find the recipe- I also omitted the almond extract for this cake.

Just a warning.. when making mousse and/or caramel, the processes are a little tricky and you really have to pay attention to what you're doing and how the ingredients are working together. And give yourself a little time with this cake, because the mousse has to be refrigerated overnight.

Chocolate Mousse
adapted from Simply Recipes
4 1/2 oz. bittersweet chocolate (chopped)
2 TBS unsalted butter
1 cup heavy cream
3 eggs (separated)
2 TBS sugar

-Whip the cream until soft peaks form and place in the refrigerator.
-In a double broiler melt chocolate and butter until smooth. Once smooth, remove from heat and let cool for a few minutes. Test the chocolate by dabbing with your finger and touching to your lip- the chocolate should be warm, but not cold. If it is too cool the chocolate will not incorporate with the rest of the ingredients.
-Whip egg whites until foamy. Sprinkle sugar over and continue whipping until soft peaks form.
-Once chocolate is the right temperature stir in yolks. Gently stir in 1/3 of whipping cream.  Fold in half of egg whites just until incorporated, then fold in remaining egg whites and finally the rest of the whipping cream.
-Spoon into serving bowl or into small individual bowls.

*Note: This is a very rich dessert and very yummy, but unfortunately I was hoping for something a little sweeter. That being said, the next time I attempt mousse I might try using semi-sweet chocolate instead of bittersweet chocolate and/or incorporate more sugar.

Ooey Gooey Caramel
Found on Recipezaar

1/4 cup white sugar
1/4 cup brown sugar
3 TBS butter
1 TBS cream
1/2 TBS vanilla
1/2 cup corn syrup
1/4 salt

-Heat white sugar in a saucepan and do not mix until it has started to melt.
-Once sugar has started to melt, stir until it becomes a golden brown color.
-When sugar has become golden, remove from heat and immediately add butter and brown sugar.
-If needed, add to low heat to make sure butter and brown sugar are incorporated. After all is combined, mix in corn syrup, cream, salt and vanilla.
-Stir together until smooth, caramel will thicken as it cools.

Now for the assembly.


Because the original purpose of this cake was for class I used a recipe that yielded 2 8-inch round cakes and actually did some splitting and slices to make this into 3 layer cake. The nice thing about doing it yourself is that you can do whatever you want...If you want to use a cake recipe that yields 3 8-inch round cakes, then by all means do so, if you don't want to slice your cakes into smaller layers you can always just fill one time around, or if you choose to slice your 2 cakes into 4 and use more filling knock yourself out :) the possibilities are endless!

I actually had a slight mishap in the removal of one of my cakes, so even though I sliced each cake in half, one 3 layers were usable- hence my 3 layer cake.

With your first layer on a cake board, start by laying on a thick layer of Chocolate Mousse,  followed by a drizzling of caramel and topped off with a handful of crushed peanuts. Always remember to leave about 1/2 inch around the perimeter to pipe the Chocolate Buttercream so your fillings don't escape each layer. After filling stage is complete place second cake layer on top and repeat filling process. Place remaining cake layer on top of filling and complete cake by frosting with Chocolate Buttercream. You can find the Buttercream recipe on an earlier post-just click away.

Voila! A Snickers inspired cake.

Happy Baking :)


Adventures in Cake Decorating: Lesson#2 Class#1

The girls and I have made it to Lesson 2 (out of 4) in Cake Decorating. I honestly look forward to these classes at the end of a long week at work- did someone say dork?? For this class we worked on a couple new borders and learned how to make rose buds and chrysanthemums. Of course I had to show off my finished product...the mums are still a work in progress but I think they're so cute! Next week we're learning how to make flowers out of royal icing- I can't wait :)


Thursday, March 4, 2010

Makin' Whoopie....Pies!

I feel like every time I take a look at a blog or some kind of baking website Whoopie Pies always make an appearance. And with all this hype I obviously had to have a go at them! It just so happened that I needed something to make for my brother, who doesn't like chocolate (crazy I know) and for my friend Ashley, who requested something with lemon and cherry involved..so as I browsed through different websites and cookbooks for the ideal cookie, I came across Lemon Whoopie Pies on one of my favorite blogs: Joy the Baker. The original Whoopie Pie is actually chocolate cake cookie filled with a fluffy white icing, so this is quite the twist, but delicious no less. (I think I've come across a great recipe for the original too, so be on the lookout for those as well!)

I must warn you that these cookies are highly addicting...per usual I had to try one before sending them off because I will NEVER EVER EVER give someone a sweet that hasn't been tried and tested by yours truly! They're very easy to eat due to the light citrus flavor and before you know it you've devoured one and all you can think about is having another.

*This recipe only makes 8 giant cookies, so I doubled it since I would be sending them to both Peter and Ashley. These cookies are actually pretty big, so you could easily make the cookie smaller and get more out of the batter., but I kinda like the idea of giant cookies. Also, the recipe on joythebaker.com calls from Lemon Cream Cheese Filling(if you want that recipe check out her site), but because I was mailing these delectable treats and you can never count on the timing of the mail, I made a basic Lemon Buttercream Icing (with Crisco) and Lemon-Cherry Buttercream Icing.

Lemon Whoopie Pies
recipe adapted from Joy the Baker (who got it from the Big Fat Cookie Book)
8 giant sandwich cookies
Oven: 350 Bake time: 10-12 min

1 1/2 cups AP flour
1/2 tsp baking powder
1/4 tsp baking soda
1/4 tsp salt
6 TBS butter (room temp)
1 cup sugar
2 tsp lemon zest
1 large egg
2 TBS fresh lemon juice (or kind in the little lemon squeeze bottle)
1 tsp vanilla extract
1/2 cup buttermilk

In a medium bowl, whisk flour, baking powder, baking soda and salt. In a large bowl, beat butter, sugar and lemon zest until smooth. Add egg, lemon juice and vanilla, mixing until blended. The batter may look slightly curdled, but don't worry about it. On low speed, add half of the flour mixture until incorporated. Mix in buttermilk and then add the rest of the flour mixture mixing until smooth again.

Using an ice cream scoop, drop batter onto a parchment lined baking sheets, making sure the cookies are about 3 inches apart from each other. They expand a good amount so you don't want them to run into each other- I went with 6 cookies on each sheet just to play it safe. Bake the cookies one sheet at a time for about 10-12 minutes, or until the top feels firm and edges are just barely brown. Cool the cookies for a good 10 minutes before transferring them to a cooling rack.

The filling:

Lemon and Cherry-Lemon Buttercream Icing
1/2 cup Crisco
2 cups powdered sugar
1 TBS water (maybe)
1/2 tsp vanilla extract
1/2 tsp lemon zest
2 TBS lemon juice
*4 TBS Cherry Jam, jelly or preserves

Cream crisco, vanilla extract and lemon zest. Beat in powdered sugar. Mix in lemon juice- add water if consistency is too thick still. If making the Cherry-Lemon Buttercream, mix in cherry jam.

To fill the cookies, turn half upside down. Use a spatula or butter knife to spread each cookie with filling. Place the other cookie bottom side down onto the filling (the filling should be touching the bottoms of both cookies, so the rounded tops are visible).

Did someone say spring time cookie?? Happy Baking!


Wednesday, March 3, 2010

Cranberry Almond Biscotti


Whenever I find myself in a coffee shop, my eyes always immediately b-line for the biscotti. Coffee is the elixir of life and anything that can accompany it, is a.OK in my book! So when I recently flipped through a new cookbook and found a recipe for biscotti I knew what I had to do.

I made this biscotti for a good friend of mine who just happens to be completing his PhD at Michigan State University..yeah, he's a pretty smart guy. During grad school Jed lived right across the street and one summer we began a morning routine: I would wake up to the Georgia sun, walk across the street to enjoy a good cup of coffee, some possible baked good (courtesy of moi) and watch a few hours of CMT. We literally did this every morning and it has become one of those things I miss most about Georgia and Jed, of course. So even though Jed and I are miles apart,  I wanted to make him something that would go well with his morning cup of coffee.

Like I said before, this new cook book of mine is awesome: The Craft of Baking by Karen DeMasco and Mindy Fox. The cool thing about this book is that it's not just straight recipe after recipe, but instead Karen offers tips and advice in building your own craft with ideas of how to make each recipe your own with new additions. And that is exactly what I did. I went with Karen's Cherry Anise Biscotti, but since I didn't have any anise or cherries on hand, I made Cranberry Almond Biscotti.

A little disclaimer: these cookies require a pretty decent baking time, so they're not something to make if you're short on time.

Cranberry Almond Biscotti
Adapted from Karen DeMasco's The Craft of Baking
Yields about 3 dozen

1 cup almonds, roughly chopped (or you can cheat like did and use the pre-sliced ones)
1 cup sugar
1 stick butter
2 eggs
1 1/2 cup AP flour
1/2 cup yellow cornmeal
1 1/2 tsp baking powder
1/2 tsp salt
3/4 cup dried cranberries

Preheat oven to 350.
Spread almond on parchment paper lined baking sheet and toast in the oven until lightly brown and fragrant. After about 5 minutes remove from oven and place on wire rack to cool.
Combine sugar and butter, beat until no butter pieces are visible.
Add eggs, one at a time.
In another bowl, whisk together flour, cornmeal, baking powder and salt. Slowly add in dry mixture for wet mixture until combined.
Add almonds and cranberries and beat just till incorporated.

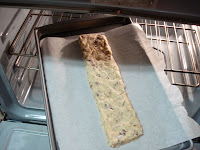
Place dough on lightly floured surface and divide in half. Shape each portion into a log and transfer to baking sheet. 
Bake about 25 minutes, or until logs are golden brown and firm to the touch. Transfer to wire rack and cool for about 5 minutes. While cooling, reduce over temperature to 250 degrees.
On a cutting board, place logs and cut on a diagonal into 1/3 inch thick slices. Arrange slices of biscotti, cut side up and bake for another hour. At this point the slices should be dry and firm to the touch. Remove and cool completely.

Happy Baking! :)