Showing posts with label chocolate. Show all posts

Wednesday, December 21, 2011

Chocolate Bourbon Pecan Pie & Christmas Cookies


Has this Christmas snuck up on anyone else?

Seems like just yesterday I was walking down the aisle and now, all of a sudden, it's Christmas time!

Can I let you in on a little secret? I just finished my Christmas shopping this week...like as in Monday afternoon..thank goodness for the internet.

And you can imagine if it took me that long to get my stuff together to buy gifts, that my cookie/holiday baking also took a hit.

In addition to the busy-ness that was my whole month of Decemeber, my cake business has been booming recently (yay!) and with two cakes to bake and decorate every weekend I really haven't had the chance to spend any other time in the kitchen.

By this time last year I was smooth sailing till Christmas- I had all my cookies baked...


and Jeweled Lace Cookies (only 35 calories a cookie!)
Not this year though... I just started baking cookies this past weekend! Would you all still want to see what I've made even after the holiday is over??

So while I'm not sharing any new cookies with you this year (yet)...If you're anything like me, and you've been slacking this year for one reason or another, I have the perfect dessert to make it up to you. This is sure to be a crowd pleaser at any Christmas dinner- a little twist on a holiday classic, this pecan pie infused with bourbon and chocolate chips will put a smile on anyone's face.
Chocolate Bourbon Pecan Pie
Adapted from myrecipes.com
Bake: 425/350 Total time: 1 hour

3 eggs, beaten
3/4 cup light corn syrup
4 TBS butter, melted
3/4 cup brown sugar
3 TBS bourbon
2 TBS AP flour
1 tsp vanilla
1 1/2 cup chopped pecans
1/2 cup semi-sweet chocolate chips
1 package prepared pie crust

Preheat oven to 425. Press pie crust into 9-inch pie dish as directed on package and press/crimp edges.
In a large bowl, mix eggs, corn syrup, butter, brown sugar, bourbon, flour and vanilla until well combined.
Fold in pecans and chocolate chips.


Pour mixture into prepared pie shell.

Bake for 15 minutes at 425, then reduce temperature to 350 and continue to bake for 45 minutes.
Transfer to cooling rack and allow to completely cool before serving.

Happy Holidays
and
Happy Baking!

Tuesday, December 13, 2011

Homemade Holiday Truffles


Whether they're a co-worker, your child's favorite teacher, a neighbor across the street or your go-to dry cleaner, everyone deserves a little a holiday cheer and what says cheer better than homemade truffles??

Sunday afternoon I spent the day with my mother making chocolates for Christmas gifts. 

We talked about friends and family and gossiped over the latest Real Housewives, all the while filling candy molds with melting chocolates and whipping up different varieties of fillings.

It's afternoons like this that I'm extremely thankful to be so close to home, especially around the holidays. 

Not only are these truffles extremely easy to make, they're absolutely delicious and make for a perfect gift.

All you need are some flavor boosters including liquors, wine, peanut butter and different flavored chips...


melting chocolates, whole bunch of chocolate chips, heavy cream, a paint brush, some candy melt bottles and candy molds (all bought at your local Michaels).


I wish I would have taken some pictures of the process, but I left my camera on the counter as I rushed out of our house on my way to my moms so all the photos are from my iphone. It's pretty easy though and hopefully this tutorial will do the trick!

First thing you have to do is make your fillings... I started with a basic ganache and then added the flavor boosters. Make sure you add your flavors at the end of the process or your ganache will separate and it will not be pretty or tasty for that matter.

Ganache
2 cups semi-sweet chocolate chips
1/2 cup heavy cream
3 TBS butter

Flavor boosters
1/4 cup liquor 
1/2 cup sweet red wine
2 heaping spoonfuls of peanut butter

In a small saucepan, heat 1/4 cup of water till boiling- you'll be using this for a double boiler.
Place chocolate chips in a large, heatproof bowl.
In a medium saucepan, heat heavy cream over medium heat until just simmering. *You don't want your cream to boil so make sure you keep stirring and really watch it.
Pour heavy cream over chocolate chips and mix gently so cream starts to melt the chocolate.
Move bowl on top of boiling water and stir until chips are completely melted and mixture is smooth.
Stir in butter and mix until mixture is smooth and butter is completely melted.
Slowly add in flavor booster- stirring until combined. (If you just wanted chocolate truffles, you don't have to add a flavor booster)
Place bowl in fridge and allow to set for at least 15 minutes before using.

Meanwhile, start to prepare candy molds.
In a small bowl, melt half bag of dark chocolate candy melts in microwave as directed on back of bag.
Using the paintbrush, coat the inside of the mold with layer of melted candy melts. *Make sure there are no holes and that when you look at the filled molds from the bottom you can't see through the chocolate.
Place coated molds in the freezer to set. Repeat with remaining molds.
Candy melts cool very fast so you have to act quickly- if your melts start to re-harden just pop them back in the microwave for about 30 seconds.

Transfer cooled ganache to candy melt bottle.
Add remaining candy melts to other bottle and heat in microwave just as you did the first batch.
Knead bottle once completely heated to ensure smoothness.
Remove mold from freezer and squeeze ganache into each mold, leaving enough space at the top to cover with a layer of melted candy melts. Knock on counter a few times to eliminate air bubbles.
Using other bottle, squeeze layer of candy melts over ganache, covering completely- knock on counter a few times to smooth layer.
Once all molds are filled and covered, pop back in the freezer to set for about 10 minutes.
Carefully flip candies out onto a kitchen towel.

Repeat process as many times as necessary.


My mom and I made 4 different kinds of chocolates- Irish Cream, peanut butter-chocolate, red wine and mint (we used Andes flavored chocolate chips in place of the semi-sweet). It took us all afternoon, but it was well worth it!

Peanut Butter-Chocolate Truffles

Chocolate Mint Truffles

Red Wine Chocolate Truffles

What are you making for gifts this year??

Happy Baking!

Monday, November 21, 2011

Left-over Halloween Candy Cupcakes


I have to admit, I got very excited around Halloween because our new place is in the 'burbs.

We literally live right around the corner of an elementary school- every morning I leave for work I see kids walking to school or waiting for the bus, when I get home in the evening they're just wrapping up their afternoons outside and playground equipment can be seen in almost every backyard..so of course I assumed we'd get to see all sorts of adorable witches and ghouls wandering our street.

But sadly, this was not the case...

You can understand my disappointment when our neighbor informed us that we probably wouldn't be getting many trick-or-treaters...they just don't walk down our street, she said.

But of course, I still had to buy that big bag of candy just in case.

We had a whopping 6 kids come to the door.. 3 of which were our neighbors.

So if you're like us and you still have plenty of Halloween candy leftover, then these are the cupcakes for you. I realize that most people are gearing up for Turkey Day, but who said you can't have cupcakes for Thanksgiving??


Left-over Halloween Candy Cupcakes
Makes 24 cupcakes
Oven: 350 Bake time: 20 minutes

3/4 cup oil
2 cups sugar
4 eggs
2 1/2 cups AP flour
1/2 tsp salt
1 TBS baking powder
1 cup whole milk
1 tsp vanilla extract
1/4 cup cocoa powder

Preheat oven to 350 and line cupcake pan with liners.
Add sugar to large bowl, and while mixer is on slowly add oil until well combined- this will allow the oil to distribute evenly in the sugar and keep your cupackes from getting too greasy.
Add eggs, one at time, beating after each addition.
In a small bowl, whisk flour, salt and baking powder.
Alternate adding flour mixture and milk, beginning and ending with flour, and mix until well combined.
Stir in vanilla.
Transfer half the batter into a separate bowl and stir in cocoa powder until smooth and combined.
Alternate adding spoonfuls of chocolate batter and vanilla batter in cupcake liners until 2/3 way full (I used 2 spoonfuls of each).
Pop in oven and bake until lightly golden and tops spring back to touch.
Allow to cool completely before frosting.


Best Chocolate Frosting
1 stick of butter, melted
2/3 cup cocoa powder
1 tsp vanilla
3 cups powdered sugar
1/3 cup whole milk

Melt butter in microwave. Stir in cocoa powder until combined. Slowly add powdered sugar, vanilla and milk beating on medium speed until light and fluffy. Add more milk if necessary.

Assembly
Crush/roughly chop a few of your favorite left-over candy bars- I went with Butterfinger, Reeses, Baby Ruth and Kit Kat.
Using a small spatula, frost your cupcakes with chocolate frosting (don't worry about it looking pretty).
Press freshly frosted cupcake into crushed candy bar, lightly rolling so all sides of frosting are now covered.

Kit Kat

Butterfinger

Reeses Peanut Butter Cup

Baby Ruth


Happy Baking!

I hope everyone has a wonderful Thanksgiving with their friends and family!!

Thursday, June 30, 2011

Oma's Flourless Chocolate Torte


No matter what, I can always count on a tasty baked good when visiting with my Oma (grandmother). 

From Viennese Crescents to Christmas Stollen, my Oma bakes all of the traditional Swiss favorites whenever family is around and this Flour-less Chocolate Torte is just one of those fabulous desserts that is an Oma classic.

Having grown up in Switzerland, baking and sweets just come with the territory for her and she is always more than willing to share with me the recipes for these delicious treats.
She also happens to be one of my biggest supporters in all of my baking endeavors and I always look forward to making something of hers.

When it came time for one of the girls at the office to celebrate their birthday I knew this was the perfect cake for the occasion. She happens to eat a gluten free diet and because this cake is flour-less it just made sense. 
To make the cake extra special I topped it with a layer of whipped cream and chocolate covered strawberries.


Oma's Flour-less Chocolate Cake
Fills one 9-inch spring form pan
Oven: 300 Bake time: 45 minutes

1 bag semi-sweet chocolate chips
6 TBS butter
1 cup sugar
6 eggs, separated

Preheat oven to 300. Spray your spring form pan with cooking spray.
In a microwave safe bowl (or over double boiler), melt chocolate chips and butter for about 2 minutes, checking every 30 seconds or so and mix until smooth.
Separate egg whites in large glass bowl, reserving yolks in small bowl.
Beat egg whites until stiff.
Slowly add sugar and continue to beat until sugar is incorporated.
Add egg yolks one at a time to chocolate/butter mixture, making sure each yolk is fully incorporated after every addition.
Fold egg whites into chocolate mixture.
Pour batter into prepared pan and transfer to oven for about 45-60 minutes.

*To check if this cake is done a toothpick should come out fairly clean, but this is a very dense and rich cake so it may not be perfectly clean. The best way to tell is if there is a good crust on the cake and the sides have begun to pull away from the pan.

Remove from oven and allow to cool completely before removing sides of pan.

Homemade Whipped Cream
1 1/2 cups heavy whipping cream
1/4 cup powdered sugar
1 tsp vanilla

In a small bowl, beat whipping cream until soft peaks form. Add sugar and vanilla and continue to beat until stiff peaks are formed. If you have time, place in fridge for about 20 minutes to help stabilize.

Feel free to cover yours with a small layer of homemade whipped cream and chocolate covered strawberries or just serve with a small dusting of powdered sugar and ice cream!

Happy Baking!

Friday, June 17, 2011

Peanut Butter Cup Surprise Cupcakes

Peanut butter and chocolate: is there any better combination?

If you're hesitating with the answer you're wrong...the answer is no.

Peanut butter and chocolate is and always will be, hands down, the best combo in the world.

I know, I know... It's a bold statement, but you can't fight the truth people.

One of the guys at the office had a birthday a few weeks ago and being a huge fan of the dynamic duo, I knew what had to be done.

Last year I made him an ultra rich Chocolate & Peanut Butter Overload Cake, so this year I mixed it up a little and made cupcakes.

I used my Dark Chocolate Cake recipe (which also happens to be my favorite) filled each with a peanut butter cup surprise and topped 'em with some delicious Peanut Butter Buttercream (recipe below).


Peanut Butter Buttercream
1 stick butter
1 cup peanut butter
3 cups powdered sugar
1 tsp vanilla
*possibly some milk or cream if its too thick

In a large bowl beat butter and peanut butter until smooth and creamy.
Slowly add powdered sugar and vanilla until smooth and creamy.


Cupcake Construction
Whip up your favorite chocolate cake recipe.
Prepare cupcake pan with liners and unwrap all your mini peanut butter cups.


Place one peanut butter cup in the bottom of each cupcake liner.


Using an ice cream scoop, fill each cupcake and transfer to oven to bake for required time.


Allow cupcakes to cool completely before frosting.
In the mean time, make your peanut butter buttercream.
Once cupcakes have cooled, pipe a good helping of buttercream on each cupcake.


Enjoy!


Happy Baking!

Friday, May 27, 2011

Marquise on Meringue

So last month I slacked a little with the Daring Bakers' Challenge and couldn't find the time to make the maple mouse and bacon cups.

And this month I waited till the last minute to prepare the dish... 

Where is all my time going?!

I'll tell you where: summer. With the sun shining and warm weather here to stay, that can only mean one thing..well a few things actually.. traveling, weddings, showers, festivals and lots of weekends spent away from home. Oh, and of course co-ed summer soccer league starts soon so that means another round of Domination Station!

Speaking of traveling, we had a fabulous vacay in Vegas.. we didn't really win big, but we managed to have a good time anyway! The city is amazing and the pastries at the Bellagio are ah-mazing. Who knew you could travel all over the world in just one city!?


But enough about me and my out of town adventures, this blog is about my kitchen adventures so let's get-cha what-cha want!

The May 2011 Daring Bakers' Challenge was hosted by Emma of CookCraftGrow and Jenny of Purple House Dirt. They chose to challenge everyone to a Chocolate Marquise. The inspiration for this recipe comes from a dessert they prepared at a restaurant in Seattle.


I felt it only fitting since both the marquise and caramel included tequila that the meringues resemble cacti ;)


Chocolate Marquise (I made a quarter of the original recipe)
Makes 6 2x2 squares

3 egg yolks
1 whole egg
2 TBS plus 2 tsp sugar
1 TBS plus 1 tsp water
Chocolate base (recipe to follow)
1/2 cup heavy whipping cream
1/2 cup cocoa powder(for rolling)
Torched Meringue

In a stand mixer, beat egg yolks and whole egg until fluffy and pale yellow (about 6 minutes).
While eggs are beating, place sugar and water in a small sauce pan and bring to a rolling boil- about 235 degrees.
With mixer on low, slowly add sugar syrup.
Once sugar syrup is added, turn mixer on high and beat for about 8 minutes.
Slowly whisk in chocolate base, trying not to deflate eggs to much.
In a small bowl, beat whipping cream till soft peaks form.
Gently fold whipping cream into chocolate-egg mixture.
Line a small 8x8 pan with parchment paper.
Pour chocolate mixture into pan and cover with saran wrap (make sure saran wrap is touching mixture)
Place in freezer for at least 4 hours- if not over night.

Chocolate Base
3 oz bittersweet chocolate
1/3 cup plus 2 tsp heavy cream 
dash of salt
dash of cayenne
1 TBS tequila
1 TBS corn syrup (I used honey because I ran out)
1/4 tsp vanilla
1 TBS cocoa powder
1/2 TBS butter, softened

Place chocolate in a small bowl.
In a small saucepan, heat cream till just boiling.
Pour cream over chocolate and whisk until smooth.
Add rest of the ingredients and whisk until smooth.
Use warm.


Torched Meringue
3 large egg whites
1/2 cup less 1 TBS sugar
splash of apple cider vinegar
1/8 tsp vanilla

Combine egg whites, sugar and vinegar in the bowl of a stand mixer. Using clean hand, reach in and mix the three ingredients together, making sure the sugar is moistened evenly by the egg whites.
Over a sauce pan of simmering water, warm egg mixture.
Use one hand to stir mixture, feeling for grains of sugar.
As liquid heats up, sugar will dissolve and the egg whites will thicken.
When mixture is silky, remove from heat.
Return to stand mixer and whisk until soft peaks are formed.
In the last 10 seconds of mixing, add vanilla.
When you're read to plate the dessert, spoon meringue onto plate and use blowtorch to broil.

Tequila Caramel (this is amazing)
1/2 cup sugar
1/4 cup water
1/2 cup cream
1/2 tsp salt
1 TBS tequila

In a small saucepan, heat sugar and water over medium heat. Boil until water completely evaporates and sugar becomes a dark mahogany color.
Working quickly, add cream to darkened caramel.
Return pot to stove and whisk gently to dissolve any hardened sugar. When the caramel has darkened remove and add salt and tequila.

Assembly
About 15 minutes before serving, remove marquise from freezer.
While still hard, remove from pan and flipping out onto another piece of parchment paper.
Cut into cubes and roll cubes in cocoa powder. These will start to melt almost immediately so don't do this until you're ready for everything else.
The cubes should sit in the fridge to slowly flaw until ready to serve.
Place torched meringue on serving plates.
Place marquise onto of meringue and drizzle with caramel.


I'm so glad I came back to this challenge.. seriously delicious.. 
I just wish we were having friends over for dinner with this dessert!

Happy Baking!


Wednesday, May 11, 2011

Peanut Butter Chocolate & Potato Chip Cookies


It's crazy right?

Potato chips in cookies!?

If you love that salty and sweet combination anywhere as much as I do then you'll really enjoy these cookies. After devouring a few, I actually wish I would have put more potato chips in them!

The idea came to me from a number of different avenues...

Remember when I used to work at The Sweet Factory? Well, they sold chocolate covered potato chips there and to be honest, they were surprisingly quite amazing.

A have I ever told you about how much I used to love crushing my potato chips and sprinkling them in my peanut butter sandwich? (Before you call me crazy I highly suggest you at least try it)

And of course, everyone knows the combination of peanut butter and chocolate is a no-brainer.

So if you're following my crazy logic you can plainly see it's a simple "if-then" equation:

If chocolate + potato chips = fantastic,
and peanut butter + potato chips = phenomenal,
and chocolate + peanut butter = amazing,
then chocolate + peanut butter + potato chips = fantastically & phenomenally amazing


Peanut Butter Chocolate & Potato Chip Cookies
Recipe adapted from allrecipes: tried & true favorites
Oven: 375 Bake time: 15 minutes
Makes 2 dozen cookies

1/2 cup peanut butter, warmed in the microwave for 10 seconds
1/2 cup butter, softened
1 cup brown sugar
1/2 cup white sugar
2 eggs
2 TBS honey
2 TBS water
2 tsp vanilla extract
2 1/2 cups AP flour
1 tsp baking soda
1/4 cup crushed potato chips *if really craving salty increase to 1/2 cup
2 cups chocolate chips

Preheat oven to 375 and line baking sheets with parchment paper.
In a large bowl, cream peanut butter, butter, brown sugar and white sugar until smooth.
Beat in eggs one at a time, incorporating after each addition.
Stir in honey, water and vanilla.
Stir flour and baking soda into peanut butter mixture and mix until smooth.
Fold in crushed potato chips and chocolate chips.
Using a small ice cream scooper or a tablespoon, drop dough onto prepared baking sheets.
Bake for 12-14 minutes or until edges are golden.
Allow cookies to cool 1 minutes before moving to cooling rack.


Happy Baking!

Monday, April 11, 2011

Chocolate Peanut Butter and Banana Granola Bars


A while back I got on a granola kick and made the stuff pretty regularly.

Then, for one reason or another, I let my inner hippie down and haven't gotten around to making it in quite a long time...

Leave it to my resident barefoot hula-hooper to get on me about though; he's been bugging me to make it now for weeks okay, maybe even months.

The other weekend was one of the first in a long time that we had absolutely nothing to do- we went on a lovely date Friday night, spent the next morning weeding the garden, met some friends for fantastic Texas BBQ, and spent the rest of the time between the couch and the backyard.


Needless to say, I had no excuse but to make MM his ever so desired granola. Of course, I wasn't going to stop there, which is where these granola bars come in.

After whipping up some Basic Granola with dried cranberries and blueberries, I decided to make use of the bag of banana chips I had in the pantry..

And what goes perfectly with bananas? Peanut butter and chocolate of course!


Chocolate Peanut Butter and Banana Granola Bars

1/2 cup quick oats
1/2 cup rice krispies
1/2 cup bran flakes
2 TBS pumpkin seeds
2 TBS sunflower seeds
1/2 cup dried bananas (lightly crushed)
1/2 cup semi-sweet chocolate chips
1/2 cup honey
1/2 cup peanut butter
2 TBS oil

Preheat oven to 300 and line a small loaf pan with parchment paper.
In a large bowl, mix oats, krispies, bran flakes, seeds, bananas and chocolate chips.
In a small saucepan, over medium heat, stir peanut butter, honey and oil until peanut butter becomes thins and mixture is smooth.
Pour warm mixture over dry ingredients, mixing until granola is evenly coated- the mixture should start to clump together.
Press granola mixture into prepared pan and flatten with back of spoon or spatula.
Transfer to oven and bake for about 8 minutes.
Allow granola to cool slightly before placing in fridge to continue to cool for at least 20 minutes.
Use a plastic knife and cut into bars.


Happy Baking!

Monday, April 4, 2011

An Austin visitor and Homemade Mallowmars


Whenever there's a chance for an adventure, E is there.

One of my oldest friends, E and I go way back...

We saw our way through the first year of high school, calling boys on her personal line, growing through our awkward phases and hanging out in basements and spent our later years slaving the summers away at The Black Pearl.

Every summer I would head up to Newport, RI, to spend a summer at the beach, working and playing the days away. E was my ultimate partner in crime... she even agreed to drive all the way from Rhode Island to Georgia to move me in to my new house at grad school.


With a knack for good food and good adventures, I couldn't have been happier when she decided to come visit us in Texas.


We spent the entire weekend exploring all that Austin had to offer- dinner at The Salt Lick, breakfast burritos, cowboy boots on South Congress, the best macarons from a little patisserie, ice cold Shiner Bock, margaritas by the lake, fried peanut butter and jelly sandwiches (are you sensing a trend here?) and we finished off the weekend with Homemade Mallowmars.


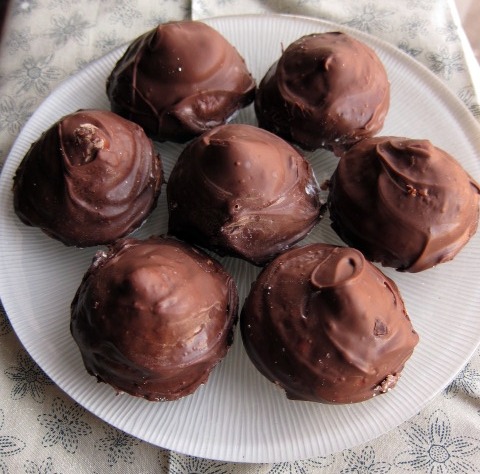
These Mallowmars consist of homemade graham crackers and homemade marshmallows dipped in warm milk chocolate.

Homemade Graham Crackers
original recipe by Baking Bites makes 48 cookies
adapted recipe makes 24

1/4 cup AP flour
1/2 cup plus 6 TBS cup whole-wheat flour
1/4 cup sugar
1/2 tsp baking powder
1/4 tsp baking soda
1/4 tsp salt
1/4 tsp cinnamon
1/4 cup cold butter, cut into 1/2 inch cubes
1 TBS honey
1 TBS molasses
2 TBS cold water
1/2 tsp vanilla extract

In a food processor, mix together flours, sugar, baking powder, baking soda, salt and cinnamon.
Add cold butter and process until mixture resembles coarse sand.
Add honey, molasses, water and vanilla.
Mix until dough starts to come together.
Place parchment paper out on kitchen counter and lightly sprinkle with flour.
Scrap dough out of mixer and onto floured parchment paper, rolling dough out 1/8 inch thick.
Transfer to fridge and chill for at least an hour.

Preheat oven to 350 and line baking sheet with parchment paper.
Cut dough with a round 1 or 2 inch cookie cutter.
Align cut-outs on parchment paper and back for about 15 minutes or until lightly browned at the edges.
Remove from oven and allow to cool.

One cookies have completely cooled, prepare marshmallows.

Homemade Marshmallows
Original Recipe by Alton Brown (I halved this)

1 1/2 packages unflavored gelatin
1/2 cup cold water, divided
3/4 cup sugar
1/2 cup corn syrup
dash of salt
1 tsp vanilla
2 TBS powdered sugar
2 TBS cup cornstarch

Spray baking dish with cooking spray.
Mix powdered sugar and cornstarch together in a small bowl.
Sprinkle one spoonful of mixture into pan and move around, making sure to cover everything as if you're flouring a cake pan- set aside.
In your stand mixer bowl, add gelatin powder and 1/2 cup water.
In a small sauce pan, add 1/2 cup water, sugar, salt and corn syrup. Place over medium heat and cover for 3-4 minutes, until boiling.
Uncover and clip candy thermometer on pan. Continue to boil until sugar mixture reaches 240 degrees, about 7-8 minutes.
Once temperature is reached immediately remove from heat.
Turn mixer on low and slowly add sugar mixture to gelatin.
Once all sugar mixture has been added, turn speed to high and continue to whip for about 10-12 minutes or until mixture thickens, becomes luke warm and looks like a glossy meringue.
Add vanilla during last minute of whipping.


Assembly
Place cookies neatly on cooled, parchment paper lined, baking sheets.
Lightly grease the inside of a pastry bag with Crisco.
Transfer marshmallow cream to bag and pipe a large dollop of marshmallow on each cookie.


Combine powdered sugar and cornstarch.
Lightly dust marshmallow topped cookies with mixture and allow to set for at least a 4 hours- we let our sit over night (covered).

Milk Chocolate Coating
1 bag milk chocolate chips
2 TBS crisco

Once cookies have set, pour chocolate chips and Crisco in a large microwave safe bowl.
Melt chips for about 2 minutes, stirring every 30 seconds, until smooth and dip-able.
Hold the cookie by the graham cracker and dunk each, marshmallow side first, into the warm chocolate, coating the entire top of the cookie.
(Our hands got pretty messy so sorry for the lack of picture)
Allow chocolate to harden and enjoy!


Happy Baking! 

Sunday, March 27, 2011

Chocolate & Meringue Coffee Cake


After spending the week in Philly for business, I took the train early Friday morning back home to spend some much needed quality time with my girlfriends.

Few people can say they still have close relationships with their friends from high school, but I’m lucky enough to not only have a fabulous group of girlfriends from my glory days, but a wonderful group of girls from college as well.

Because of this, time spent at home can be stressful at times, as I try to make sure to see as many as possible when the trips are few and far between.

This weekend however, as short as it was, was perfect.

Friday I spent the evening preparing dinner and chatting the night away with my girlfriends from high school, while Saturday would be dedicated to my ladies from college.

I woke up early Saturday morning anticipating that with the arrival of the girls, something sweet would be necessary.

I knew exactly what would be made…


The March 2011 Daring Baker’s Challenge was hosted by Ria of Ria’s Collection and Jamie of Life’s a Feast. Ria and Jamie challenged The Daring Bakers to bake a yeasted Meringue Coffee Cake.

Chocolate & Meringue Coffee Cake
Ria’s original recipe yielded 2 cakes, but this is the recipe for 1.

Yeast cake:
 2 cups flour, plus a little more for kneading
3 TBS sugar
¼ tsp salt
½ package active dried yeast
6 TBS milk
3 TBS water
¼ cup butter
1 egg, room temperature

Meringue:
2 large egg whites
¼ tsp salt
½ tsp vanilla
¼ cup sugar

Filling:
1/2 cup semi-sweet chocolate chips
2 TBS sugar
1 tsp cinnamon

Preparing the dough
In a large bowl, mix 1/2 cup flour, sugar, salt and yeast.
In a saucepan, combine milk, butter, and water and heat over medium heat until warm and butter has completely melted.
With an electric mixer, gradually add warm liquid to flour/yeast mixture, beating until blended. Increase mixer speed and add egg and 1/2 cup flour, beating for about 2 minutes.
Using a wooden spoon, stir remaining flour to make a dough that holds together- you may end up using more than 2 cups. 
Turn dough out onto floured surface and knead dough for about 8-10 minutes until dough is soft, smooth and elastic, adding as much flour as needed.
Place dough in lightly greases bowl, turning to coat all sides. Cover bowl with saran wrap and place in empty oven with light on to double in size (about 45-60 minutes).

After an hour, make meringue
In a large mixing bowl, beat egg whites and salt until frothy. Increase speed to high and continue to beat until foamy and opaque. Add vanilla and sugar, one tablespoon at a time as you beat, until very stiff, glossy peaks form.

Assembling the coffee cake
Turn dough out on lightly floured surface. Beat down and roll out dough into a 20x10 inch rectangle. Spread meringue evenly over top the rolled out dough and sprinkle cinnamon, sugar and chocolate evenly over meringue. 

Roll up dough, jellyroll or cinnamon roll style, starting on long side forming a log. 
Very carefully transfer filled log onto baking sheet or pizza stone and bring ends of log around, sealing ends together, forming a ring, tucking one end into the other and pinching to seal.
Using kitchen scissors, make cuts on the outside edge at about 1 or 2 inch intervals.

Cover coffee cake with plastic wrap and return to empty oven to allow to rise again for 45-60 minutes.

Preheat oven to 350. Brush tops of coffee cake with egg wash and bake for 25-30 minutes until risen and golden brown. The dough should sound hollow when tapped.


When I originally read this recipe I was intrigued as to how the meringue would fit with a coffee cake, but I must say, this is one of the most delicious breakfast treats I’ve made to date. Light, fluffy, and perfectly sweet this yeasty cake was a great companion to a morning cup of coffee.

Happy Baking!